The astrophotography processing flow can be broken down into three main phases:
- Preprocessing
- Linear processing
- Non-Linear processing
For preprocessing, we take our individual images, align, and stack into a single image per filter. But this workflow includes many individual steps that I typically follow with no deviation (1. Image Calibration, 2. Cosmetic Correction, 3. Subframe Selector, 4. Star Alignment, 5. Local Normalization, 6. Image Integration, 7. Drizzle Integration)
For a while, PixInsight included a Batch Preprocessing script. This was helpful, but it didn’t have the capability to handle every part of my preprocessing workflow. However, around 2021, the Batch Preprocessing script received some very welcome enhancements that incorporates all parts of my flow. I know almost entirely use the latest Weighted Batch Preprocessing script for my astrophotography images.
Prerequisites
Before we begin, we need to have a Cosmetic Correction icon within our PixInsight workspace so it gets incorporated into the script. To create the icon, simply figure out the Cosmetic Correction settings, then drag the triangle (lower-left corner of the wizard) onto the workspace. It is a good idea to label the icon after creation.
Overview
The Weighted Batch Preprocessing script (Script – Batch Preprocessing – Weighted Batch Preprocessing) might take a few moments to load, especially if it was already loaded and populated with files.
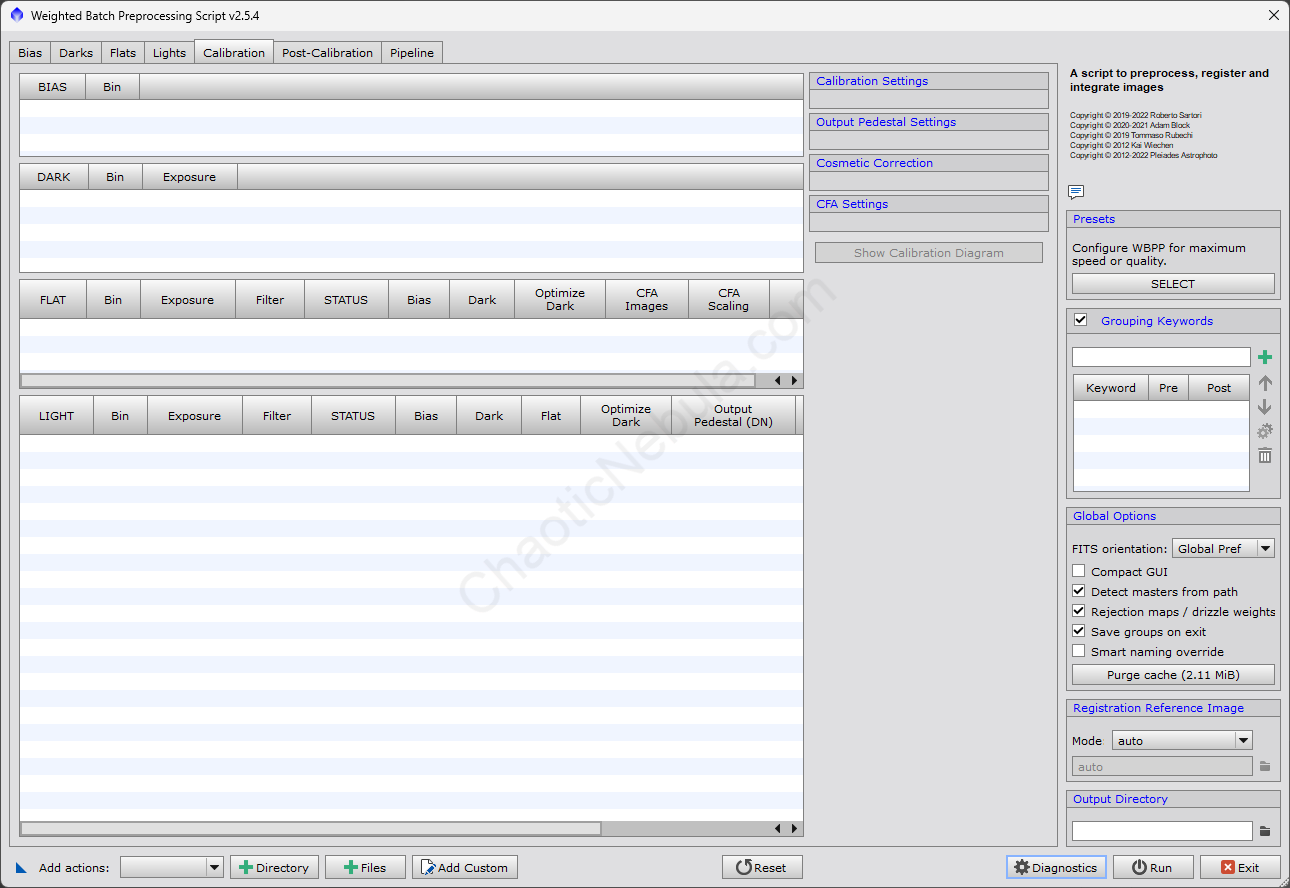
The wizard is broken down into
- Bias: Provides the configuration parameters to create a master bias frame.
- Darks: Provides the configuration parameters to create a master dark frame
- Flats: Provides the configuration parameters to create a master flat frame.
- Lights: Provides the steps on creating a master light frame. This uses the Image Calibration, Cosmetic Correction, Subframe Selector, Star Alignment, Local Normalization, and Image Integration steps of my manual preprocessing workflow.
- Calibration: The calibration panel provides details how the bias, dark, flats, and lights are integrated into master images.
- Post-Calibration: The post-calibration allows you to set the Drizzle Integration workflow
- Pipeline: provides an overview of all processing steps, including estimated disk space requirements per step.
The script does have the intelligence to identify and categorize these files into the appropriate buckets, but this is often based on file and folder names. I prefer to specify these categories manually with the Add Actions button in the lower-left corner.
Bias
We first add our Bias images.

If you add individual frames, the weighted batch preprocessing script will create a master bias. If you already have a master bias, the script will use the master bias image as-is with no further processing.
The Image Integration section of the Bias tab details how the bias images are integrated into a single master bias frame. Typically, these settings can be left at the defaults.
Darks
We now add our Dark images.
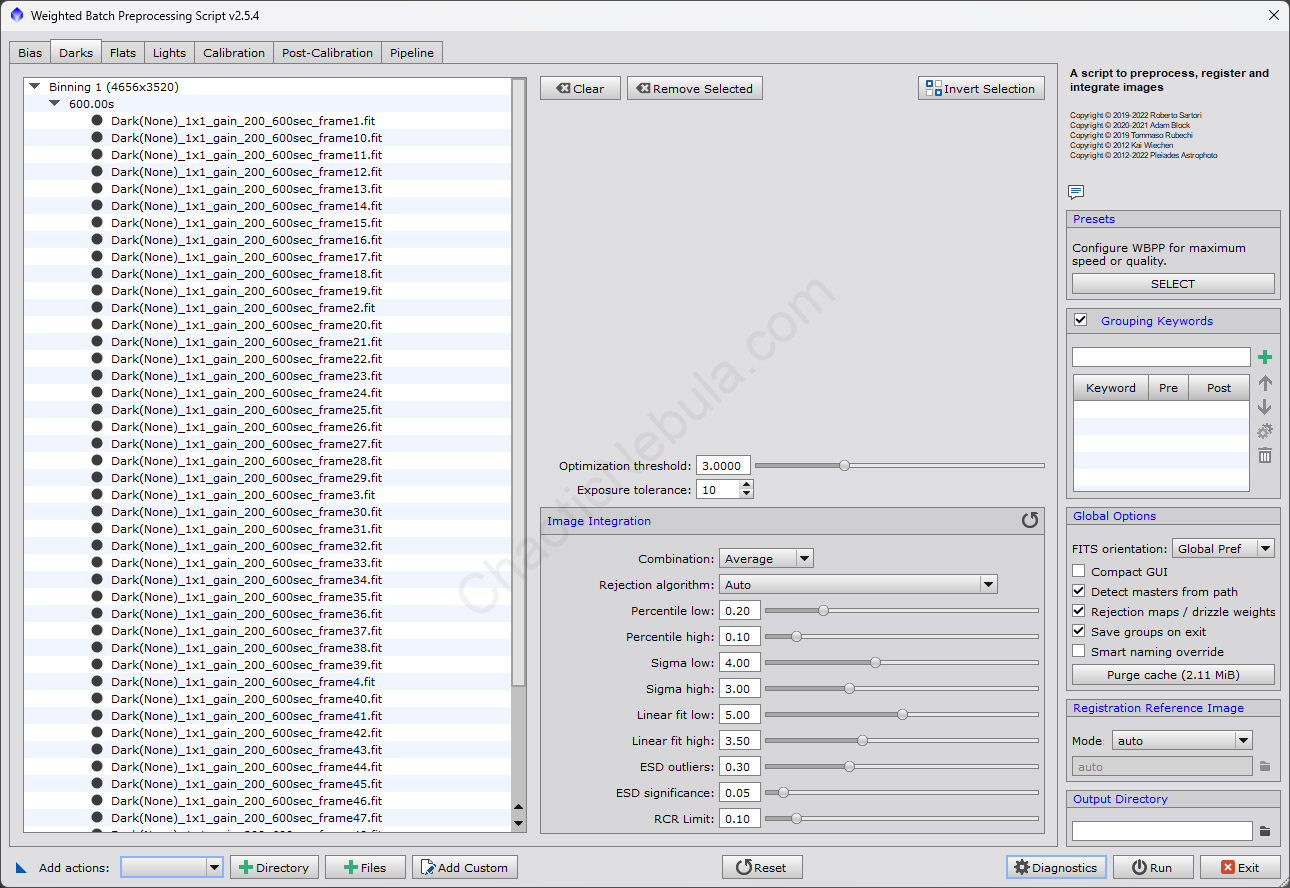
Just like the Bias section, if you add individual frames, the weighted batch preprocessing script will create a master dark frame. If you already have a master dark, the script will use the master dark image as-is with no further processing.
The Image Integration section of the Dark tab details how the dark images are integrated into a single master dark frame. Typically, these settings can be left at the defaults.
Note: The Exposure tolerance setting tells the script that any image within the defined number of seconds should be considered the same. An image at 595 seconds will get integrated with an image at 604 seconds. If you are using Dark Flats, you will want to move the exposure tolerance to zero so that it creates dark flats per filter exposure.
Flats
We now add our flat images.
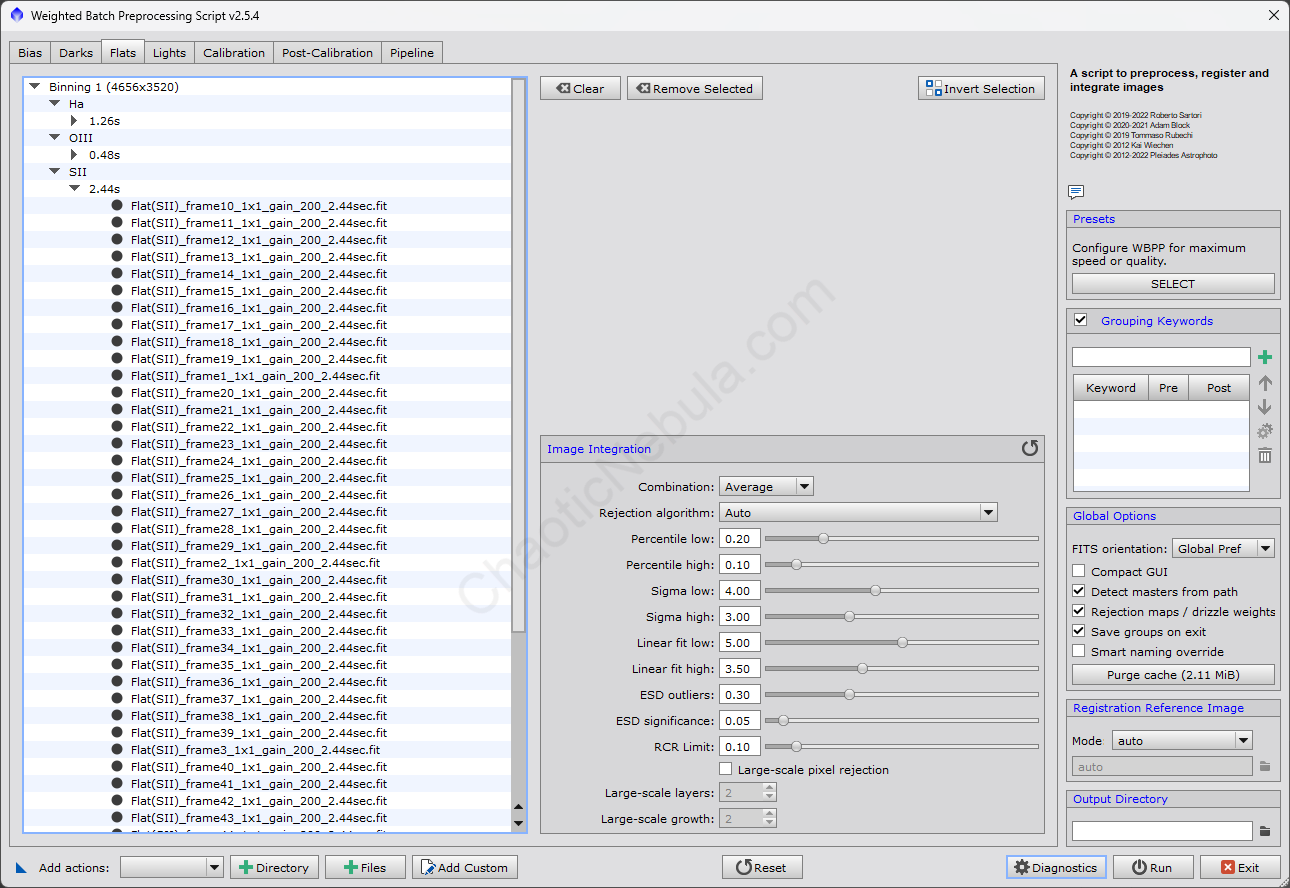
This is where your file/folder naming structure is useful. Because my files are labeled with the word Flat and the Filter name, the preprocessing script is able to group the files together and create master flat frames for each filter.
Lights
We now add our light images.
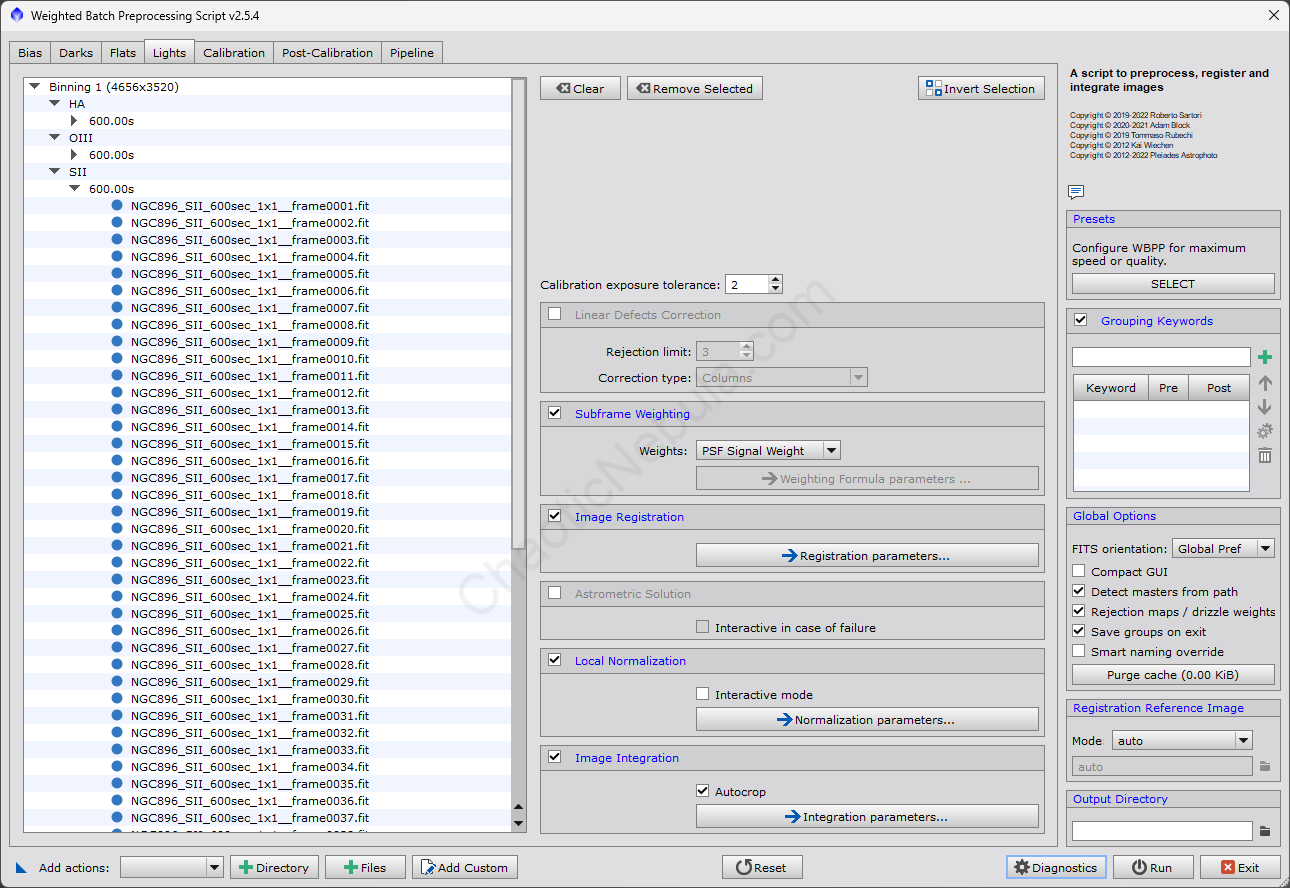
Again, having the filter name within the file name will allow the preprocessing script to group images by filter.
The Lights tab, provide us with many additional options regarding calibration and integration.
- Subframe weighting. This aligns with the Subframe Selector process where each frame is graded and weighted based on the quality. You can select the option for weights, with PSF Signal Weight often works well.
- Astrometric Solution: This will try to platesolve your image. I typically skip this step and do it manually later in the workflow. If you select this, it is good to not select Interactive in case of failure. If you do select it, the script stops if this section fails.
- Local Normalization. This aligns with the Local Normalization process. I prefer to have my location normalization process be based on multiple integrated images instead of a single image. By selecting Normalization parameters, you can have your reference frame be based on the integration of best frames and specify the maximum number of frames to use.
- Image Integration: This aligns with the
- For preprocessing, we take our individual images, align, and stack into a single image per filter. But this workflow includes many individual steps that I typically follow with no deviation Image Integration process.
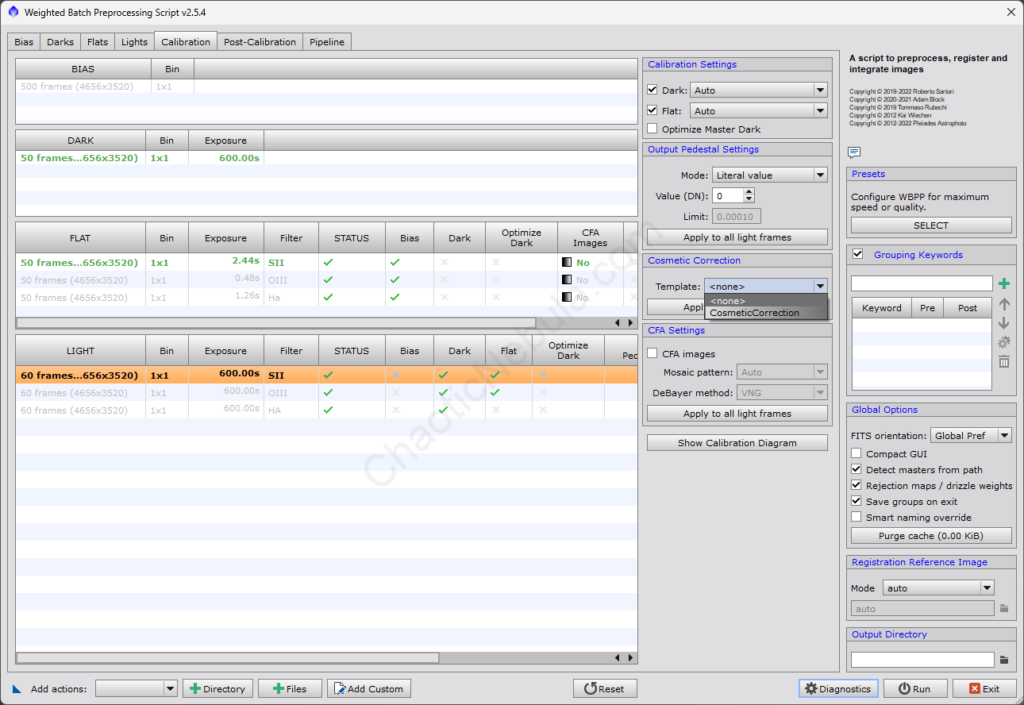
Calibration
With our frames added, we now verify our settings in the Calibration tab.
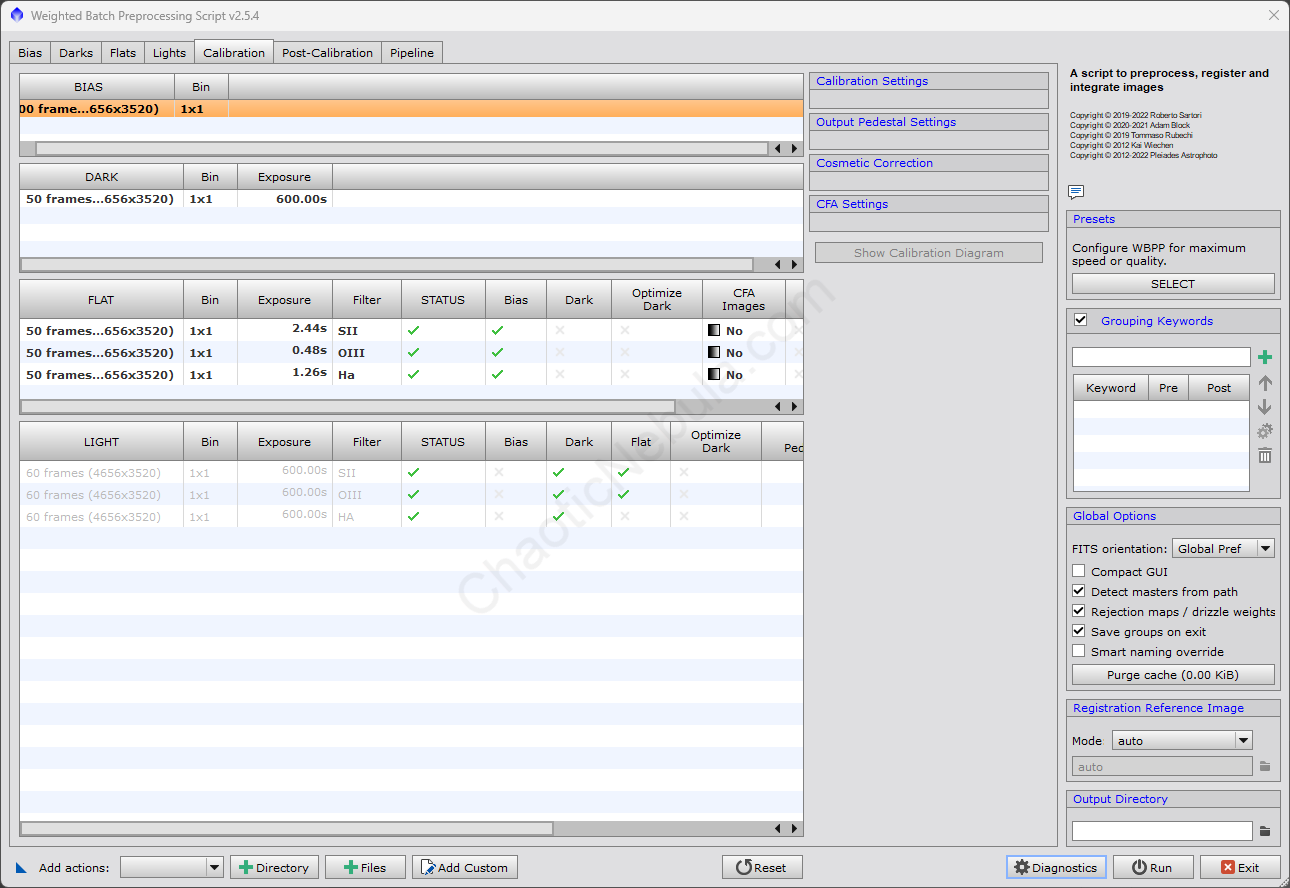
Verify the following items:
- Bias: All bias images should be contained within the summary
- Dark: All dark images should be contained within the summary
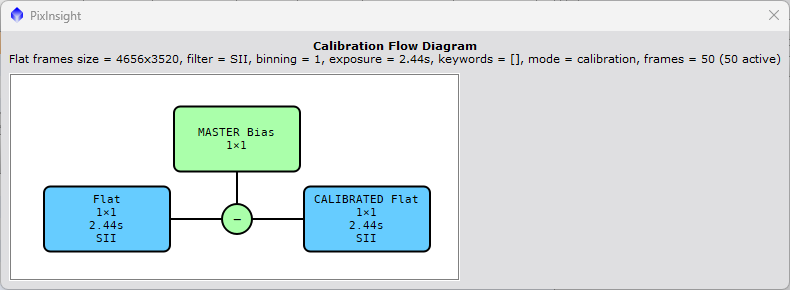
- Flat: All flat images for the different filters should be included. If Bias frames are used, the Bias column should have a green check. If Dark Flats are used, the Flat column should have a check. Selecting Show Calibration Diagram, provides information on how the master flat frame is created.
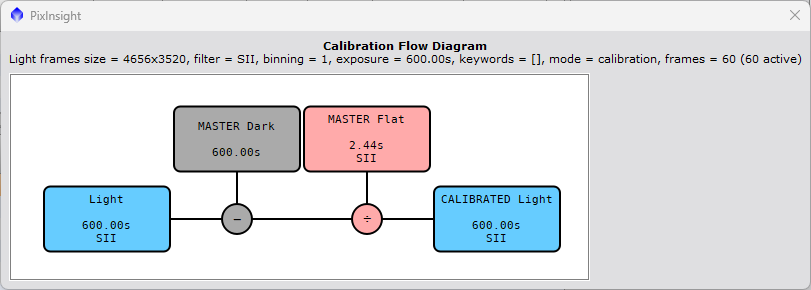
- Light: All light images should be broken up into the different filters. If Bias frames are used and not already subtracted from the flats, the Bias frame column has a green check. If dark frames are used, the Dark column should have a green check. If Flats are used, the Flat column should have a check. Selecting Show Calibration Diagram, provides information on how the master light frame is created. If the light frames don’t have the correct darks or flats assigned, they can be manually selected within the Calibration Settings section of this screen.
- Cosmetic Correction: If a Cosmetic Correction template is setup within the workspace, select it within the Cosmetic Correction selection. If Cosmetic Correction is used for all light images, select the button Apply to All Light Frames
Post-Calibration
If we want to do Drizzle Integration with our light images, we select the Post-Calibration tab.
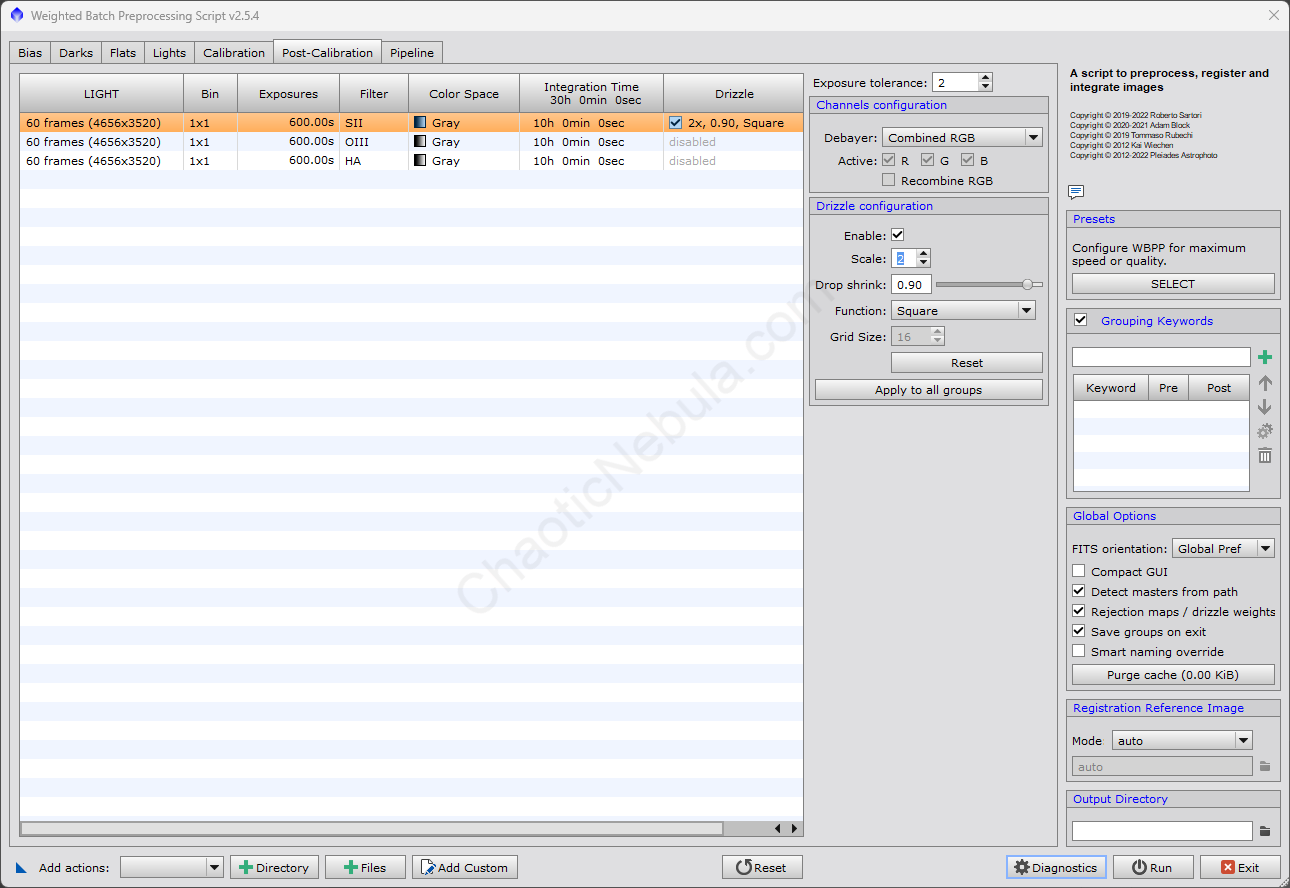
To enable Drizzle Integration
- Select Enable
- Increase the scale, most likely a value of 2
- Select Apply to all groups
Note: When you enable and when you set the scale value, the screen might freeze for a few minutes as it recomputes.
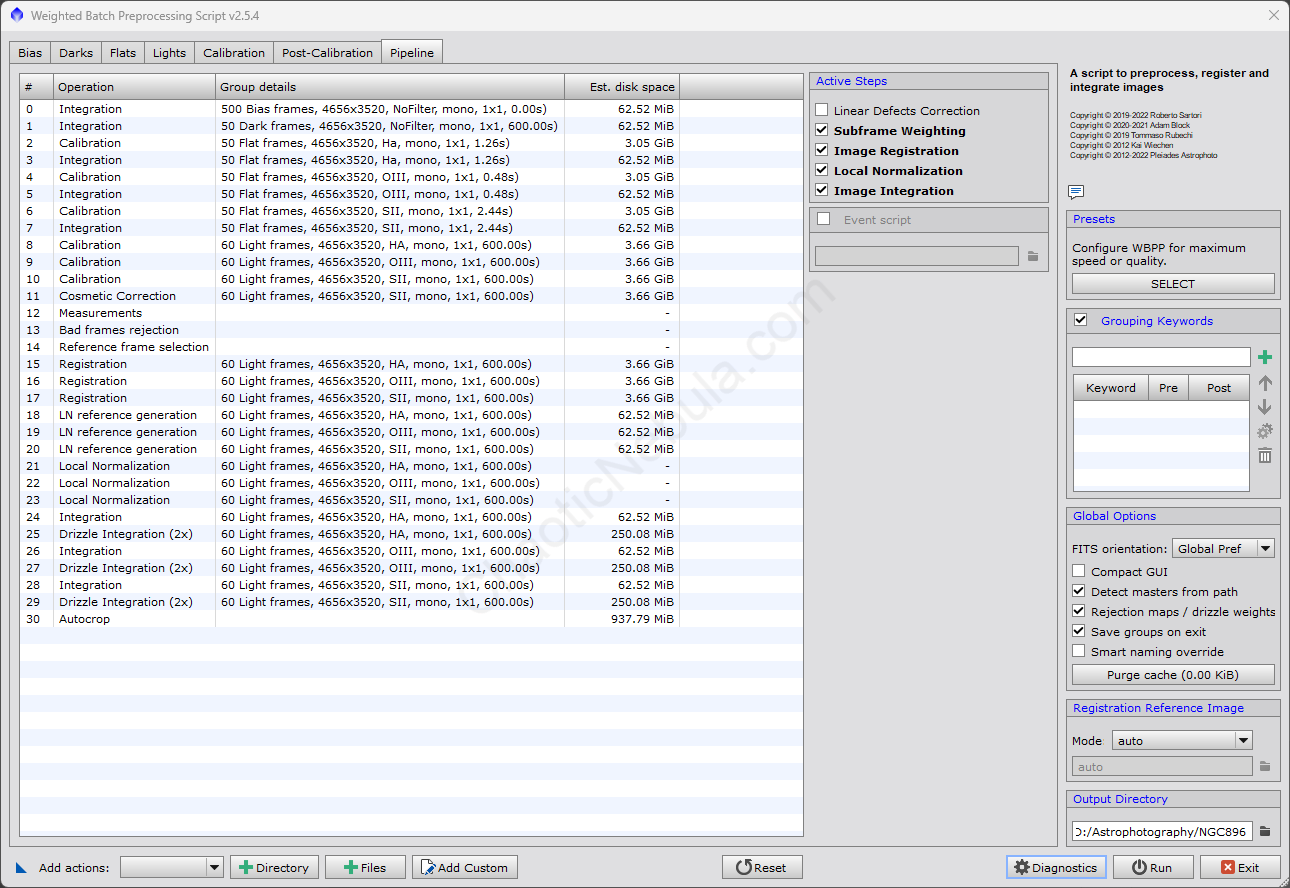
Pipeline
When all configuration items are complete, we select the Pipeline tab. This provides an overview of the entire script process and estimated disk space (it will be a lot)
Run
Before hitting Run, check the following
- Output Directory: Select the output directory for the weight batch pre-processing script.
- Diagnostics: Select the diagnostics button. This does a pre-check on the config to make sure you haven’t missed anything
If everything looks good, select Run and walk away for a few hours.