One approach for doing noise reduction is to use the PixInsight Mure Denoise script. In one shot, you can significantly reduce noise in each master image.
When using Mure Denoise, it must be done immediately after the frames are integrated into a single master image.
Note: If using Mure Denoise, you CANNOT use drizzle integration as this changes the original pixel values. After an analysis between Mure Denoise or Drizzle Integration with Noise Reduction, I’ve determined that the baseline image will help me decide on the approach.
Mure Denoise Settings
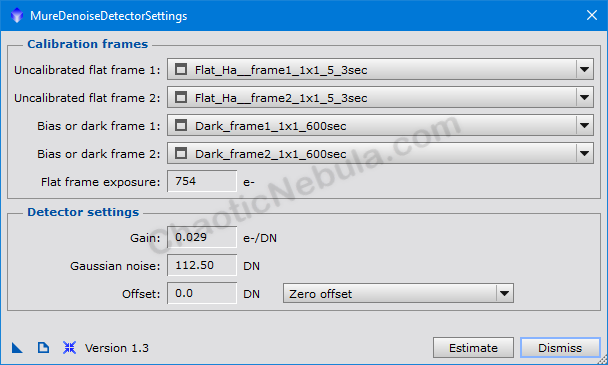
Mure Denoise requires a few parameters to be set. The easiest way to gather these parameters is to use the Mure Denoise Detector Settings script (Script – Noise Reduction – Mure Denoise Detector Settings)
In order for this to work, you must load to uncalibrated flat field images and 2 uncalibrated Dark or Bias frame images. Once done, selecting the Estimate button will generate the detector settings for your camera.
Mure Denoise Script
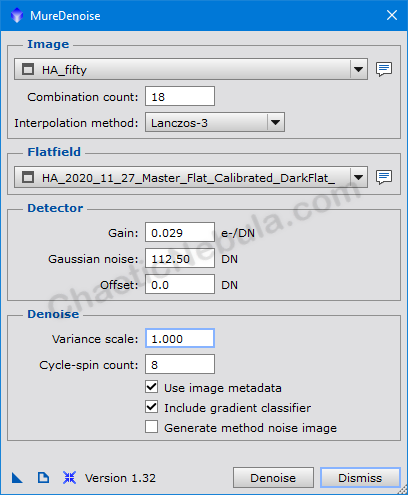
With the detector settings identified, we can now run the Mure Denoise script. Before we launch the script, we need to load the light image and the master flat field image.
Once loaded, run the Mure Denoise script (Script – Noise Reduction – Mure Denoise).
A few things to make note of:
- Combination Count: This must equal the number of images used to create the master light frame.
- Detector settings: These must be applied based on the Mure Denoise Detector Settings script
- Variance scale: This equates to the strenth of the noise reduction. The default value of 1 is often too high and results in a plastic-like final image. You need to find the right balance for your images.
- Cycle-spin count: How many iterations will the script run. More produces higher quality images but takes more time. Eight is a good starting point.
Mure Denoise Variance Scale
The following shows the results of the Mure Denoise script with different levels of variance.
The series looks at the impact of changing the variance from 1.00 to 0.50.
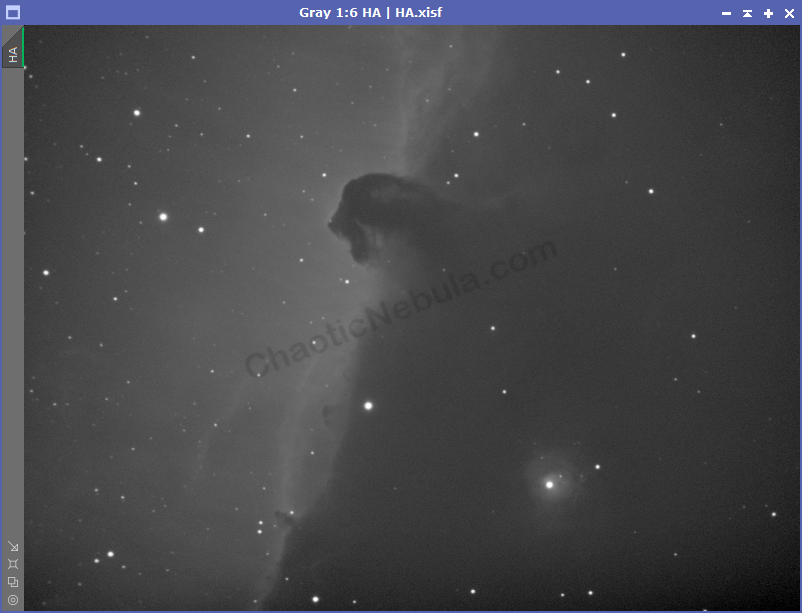

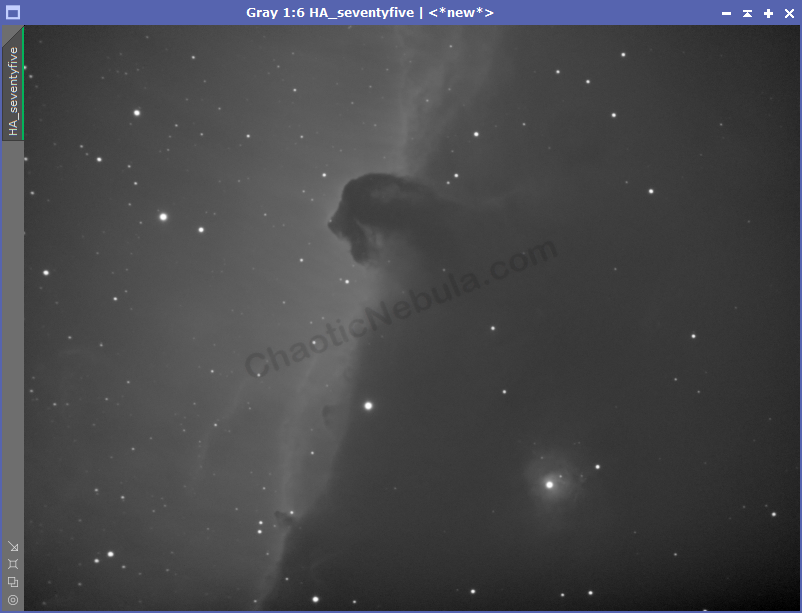
My personal preference is to go with the variance set at 0.500 as it does a nice job of noise reduction without removing all noise.
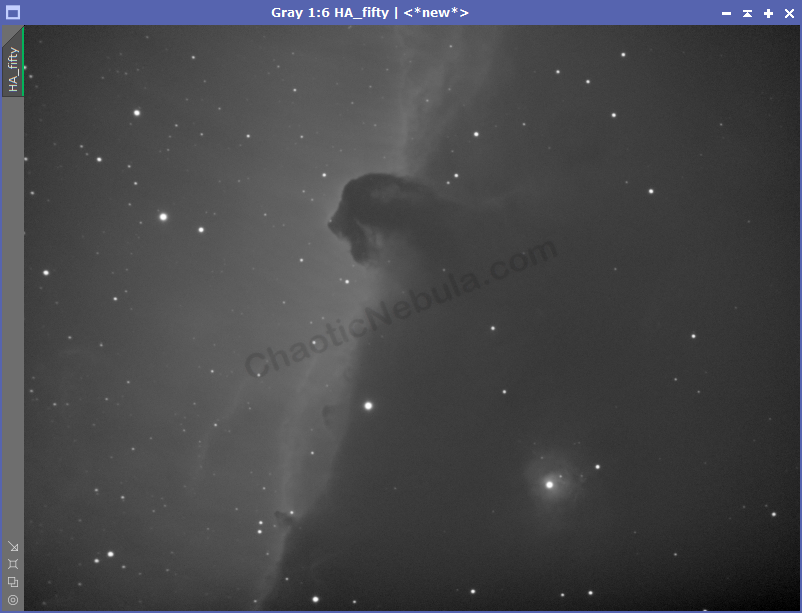
Mure Denoise Flatfield Use
An optional parameter is whether to use the master flat image in the Mure Denoise settings. Of course, this will all be dependent on your images and setup.
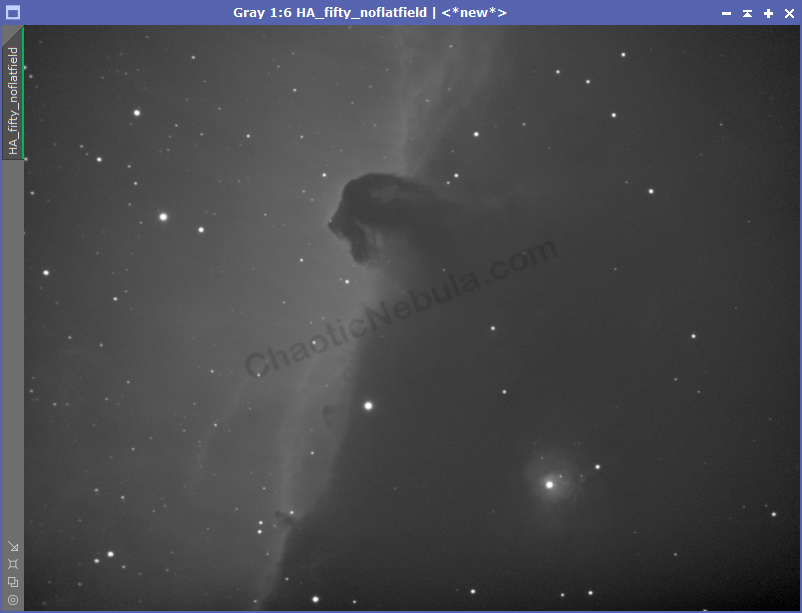
I’m unable to see a different between using and not using a flatfield with my current setup. Because it doesn’t cost much time, I will continue to use it.
What’s Next
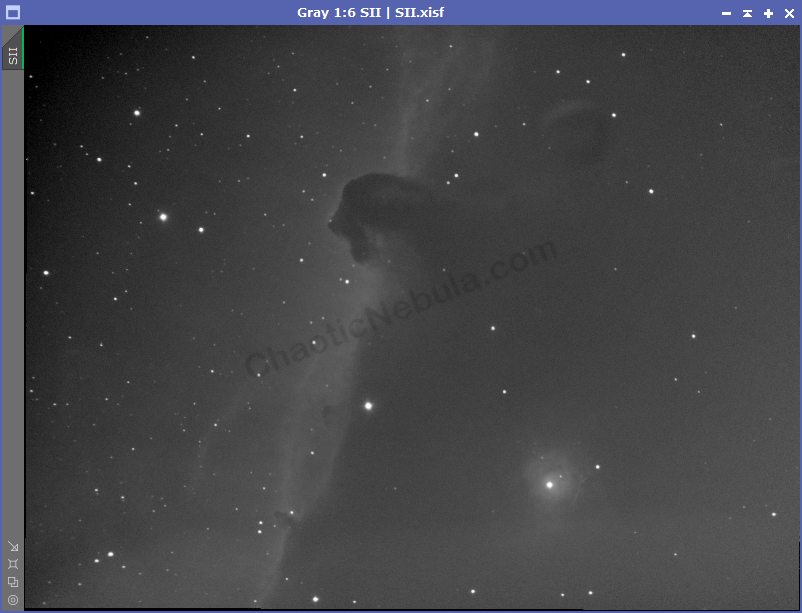
Depending on the filter used, the results are even more pronounced. The examples above used Hydrogen-Alpha filter, which produces a high signal, low noise result. When using Sulphur-II, the original image has much more noise.
Mure Denoise continues to produce a very nice result.
Once noise reduction is complete, we can continue with the workflow by doing a dynamic crop.