Many astrophotography images contain very faint structures. With a focused stretching for the luminance channel, we can brighten these structures slickly so are not lost in the background haze.
Once we’ve completed a basic stretch on the luminance channel, we dan direct our attention to the more subtle areas of the object.
Aggressive Stretch
In order to bring out the subtle details, we need to do a much more aggressive stretch than we would normally do. The stretch is done on a cloned version of our luminance image.
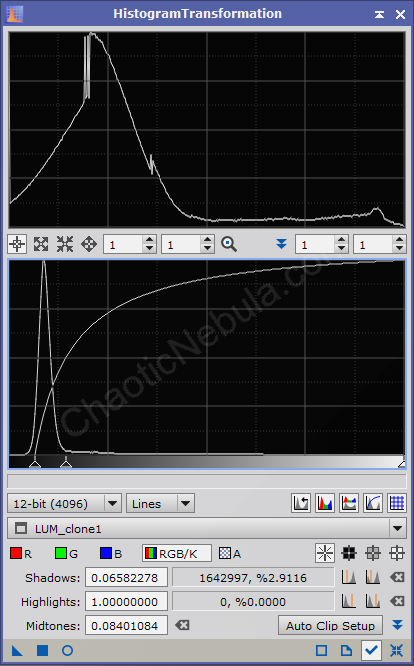
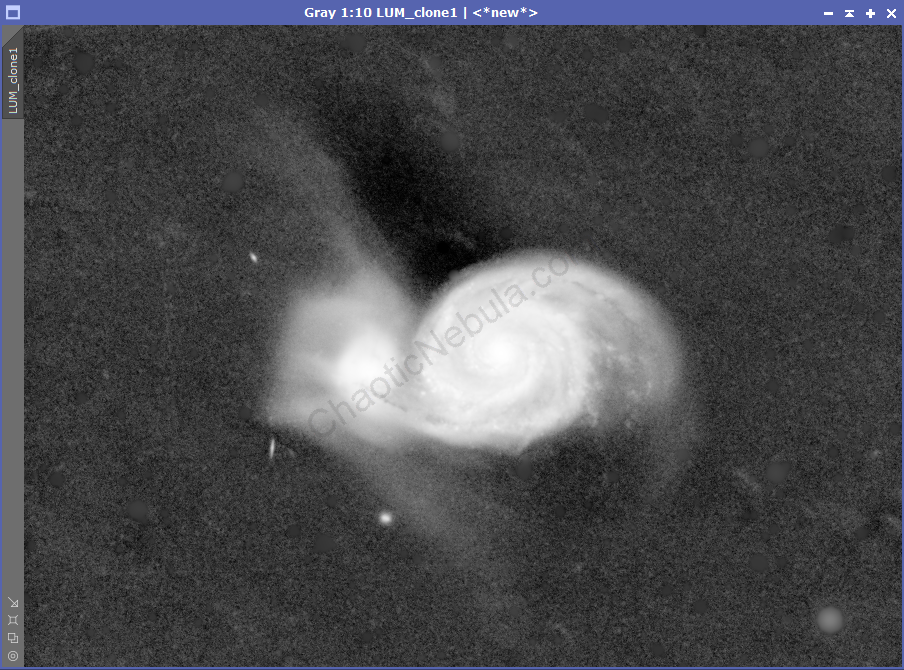
With an aggressive stretch, we can more easily see the faint areas coming off of the arms of the galaxy. Those faint areas are what we need to bring out in our luminance image. To do this, we need to create a range mask.
Range Mask
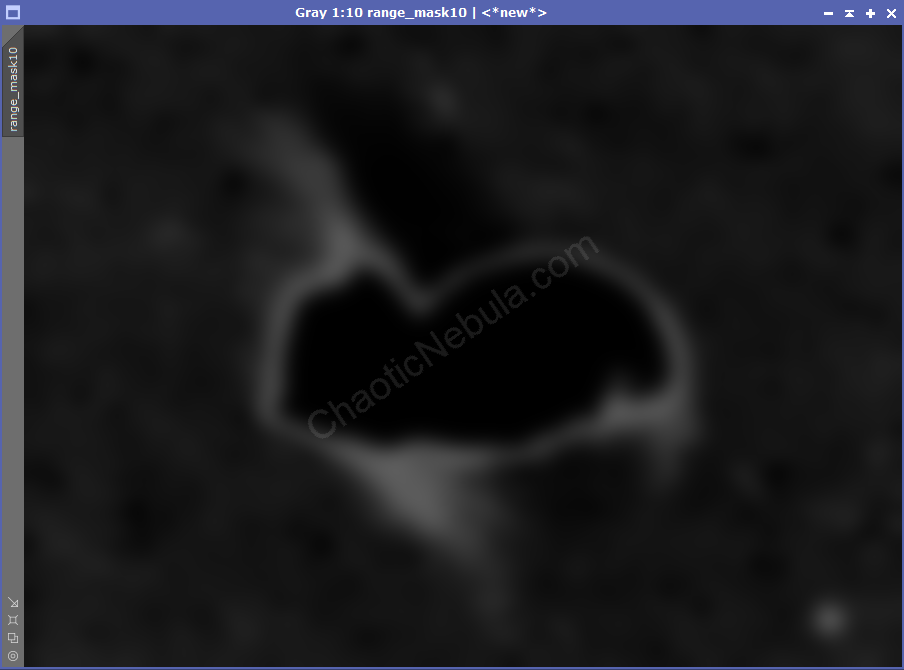
Because we only want to brighten the very faint areas of the galaxy, we need to create a range mask that targets only those areas. The very bright and very dark areas must be ignored.
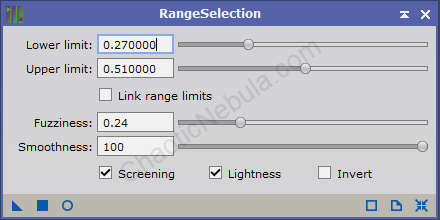
To do this effectively, you will want to use live view.
- Enable Live View
- Screening: Enabled
- Smoothness: Set to 100
- Lower Limit: Adjust to the point where the faint areas are still visible
- Upper Limit: Adjust so the bright areas just reach the edges of the faint area
- Fuzziness: Set between .2 and .3
This might take a few cycles to get the right levels. After the mask is created, we can apply to our luminance.
Luminance Enhancement
The range mask, once applied to our original, stretched image, will protect the bright and dark areas from modification. Any changes we make to our image will only impact the faint wispy areas.
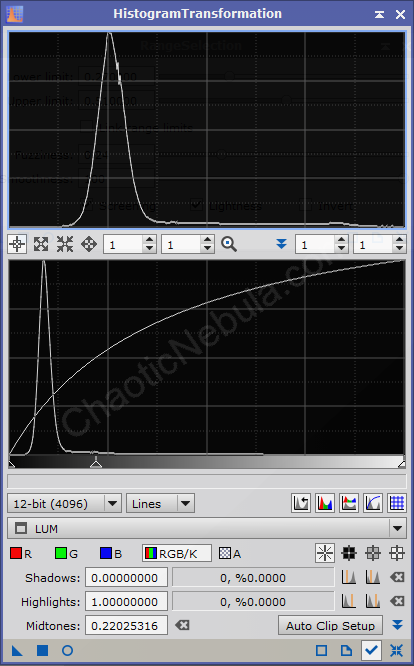
As we move the middle Histogram Transformation slider to the left, the faint areas will gradually become brighter. Avoid going too far as the faint areas need to gradually merge with the brighter areas. We need to avoid sharp boundaries between the masked and unmasked areas.
Once the adjustments are complete. Save the file.
Next Steps
Our next step for the Luminance Workflow is to add definition to the bright areas with Luminance HDR Transformation.