With Dynamic Background Extraction, we can further remove light pollution gradients and residual amp glow from our cameras in an effort to create a more flat image. The image calibration and the local normalization process should have helped out significantly with these items, making dynamic background extraction easier.
Note: A newer and easier to use process now exists in PixInsight called Gradient Correction. It is recommended to try that process first.
NOTE: There is an Automatic Background Extraction tool. It works just like the dynamic process except you have no control of what is background and what is a celestial object. Automatic background extraction is good to get a quick and dirty look at what is hidden in the background but should not be used for your final image processing.
Correcting Vignetting Anomalies
The first part is to use dynamic background extraction to remove any vignetting you might have in the image. Vignetting is where the edges are darker. Vignetting can become quite severe in situations where focal reducers are used.
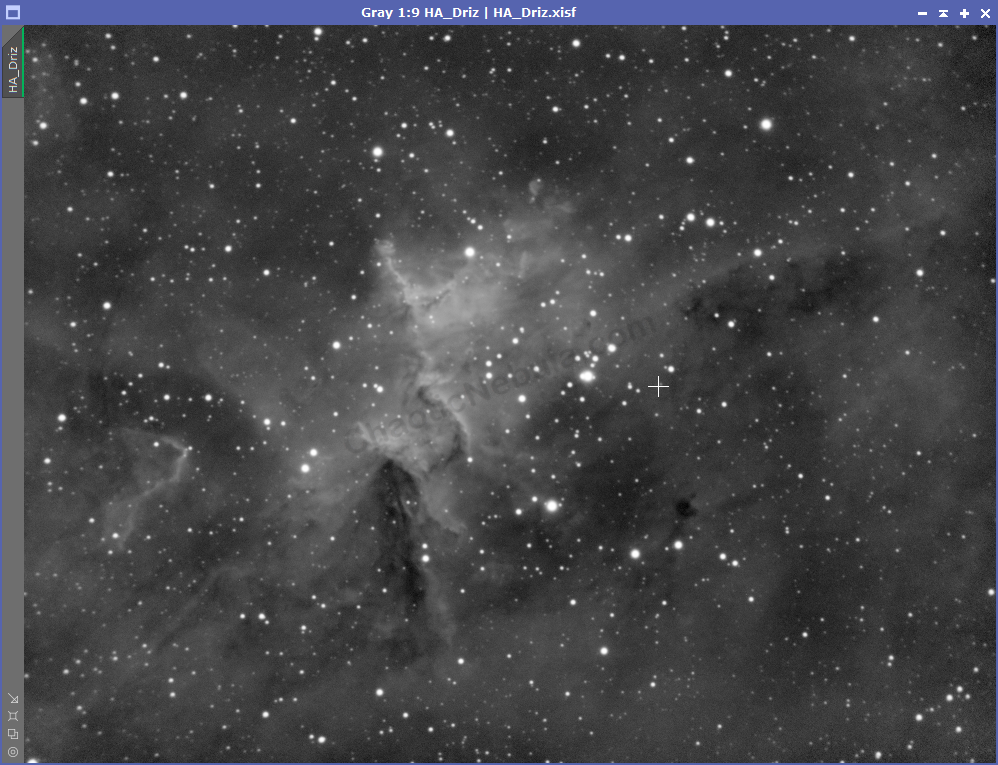
To do this successfully, you will create a single background model and apply to all images. To create the model, it is best to select the filter with the most details, oftentimes Luminance, Red or Hydrogen-alpha filters.
- Select the image and make it full screen. Zooming in so the image fills the entire area.
- Launch Dynamic Background Extraction and hit RESET
Your first goal is to remove vignetting, which means you need to have the generated background model focus on the perimeter of the image.
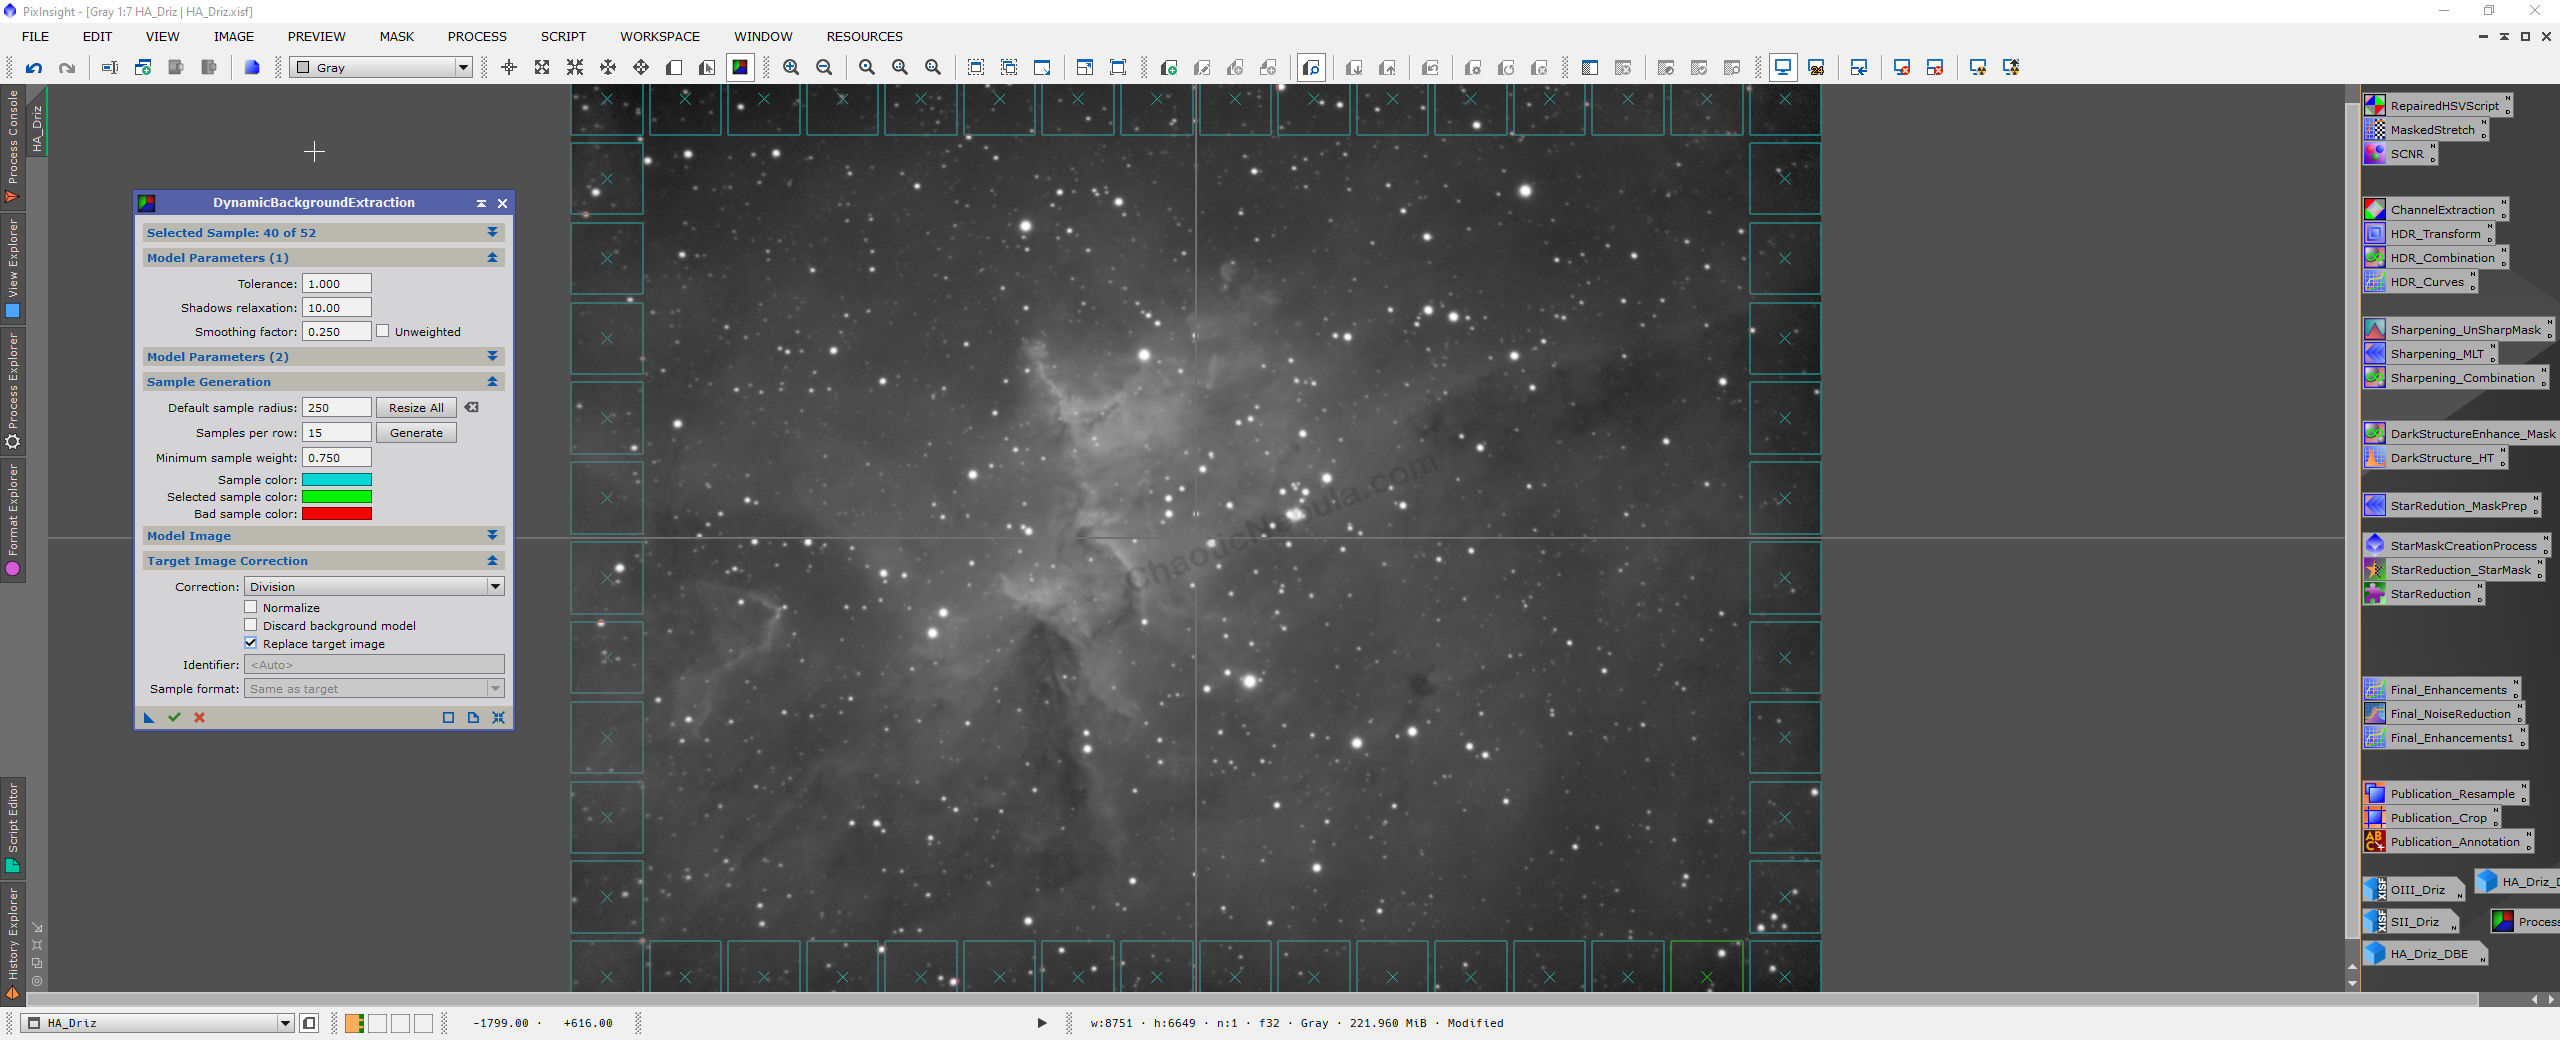
Set the following:
- Tolerance: 1
- Shadows relaxation: 10
- Smoothing factor: .25
- Default sample radius: 250
- Samples per row: 15
- Sample Color: Change this to something that is easier to see on a gray image
- Select Generate
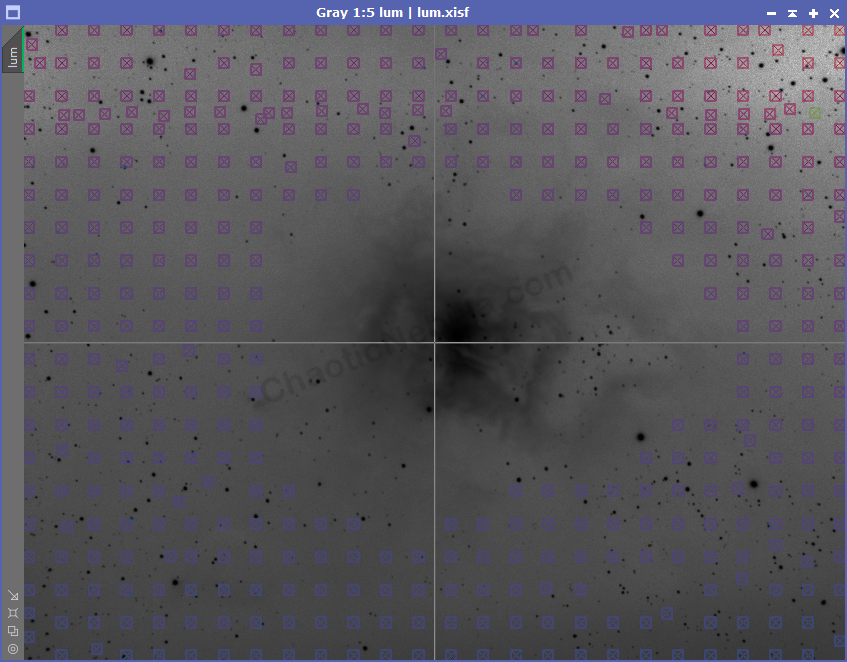
When dynamic background extraction generates a sampling model, those samples will cover most of the image due to our tolerance/relaxation parameters. We need to increase those parameters so that the entire outside edge is selected.
- Remove any sample boxes that are internal.
- For image correction
- Correction: Division
- Discard background model
- Replace target image
- Drag the new instance icon to the PixInsight workspace to create a copy of this model.
- Execute
- Close and reload the copied instance of the dynamic background extraction.
- Change correction to subtraction and execute
- Repeat this process for all images
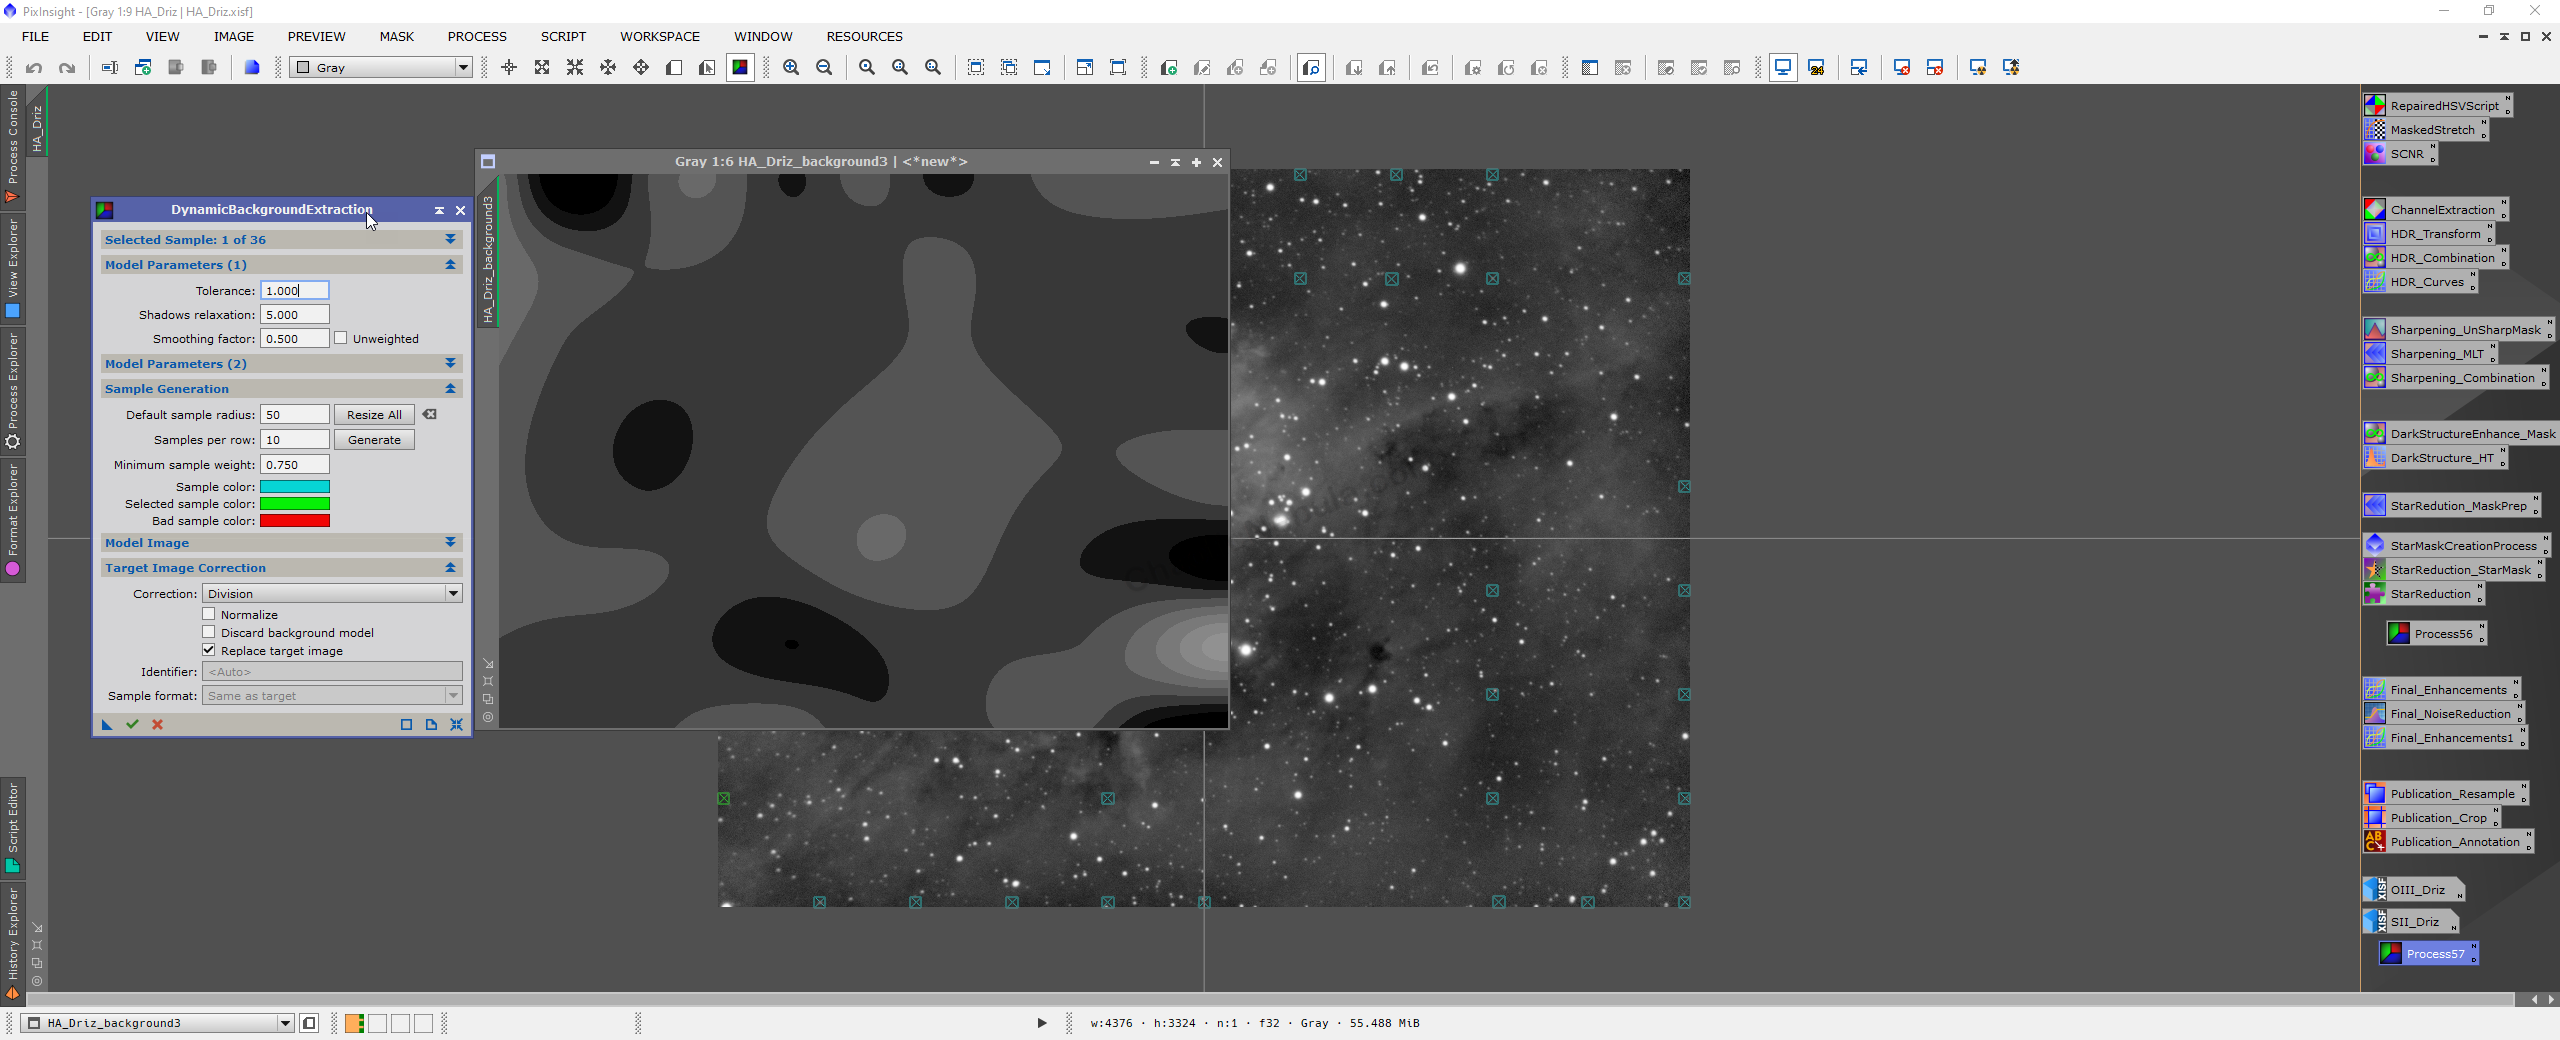
Correcting Background Gradients
The next approach is to create a more focused background model by only placing the points on those areas that are truly the background. This helps us not throw away actual data.
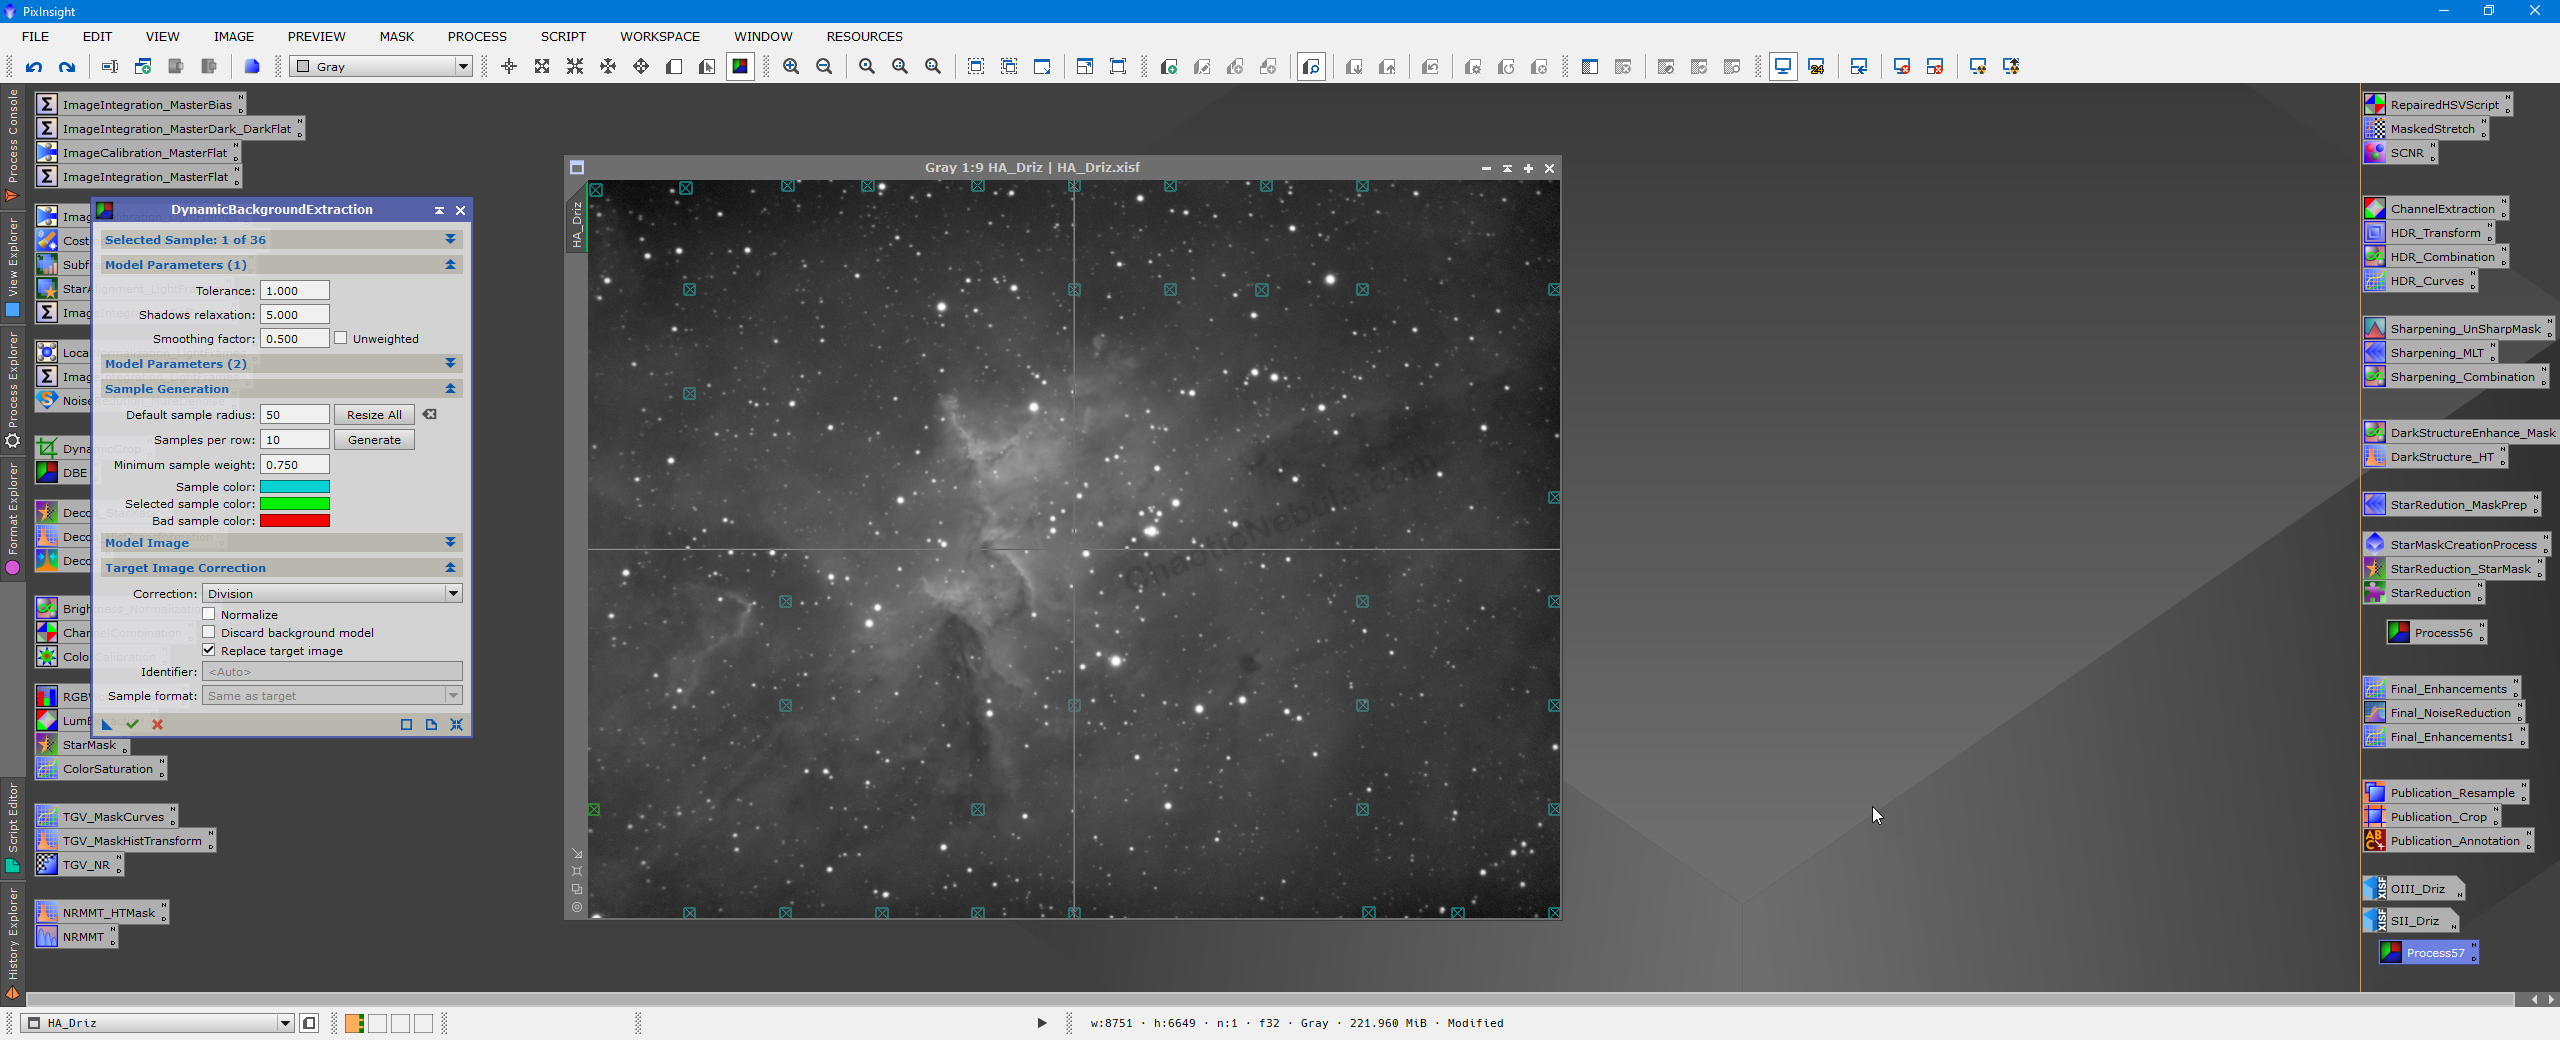
- Sample Generation:
- Sample Radius: Increase to 25-50. This will make it easier to manipulate
- Samples per row: Set to 10-15. You don’t need hundreds.
- Sample color: Change to something other than gray
- Select Generate to see what sample points we get with default parameters
You want the process to apply most sample points, so you have less editing to do. This is where you change the model parameters:
- Model Parameters
- Smoothing Factor: Increase to .5 to create a smoother backround.
- Shadows Relaxation: If the sample points are not hitting the dark areas, increase this parameter to 5 or more. Select generate again to see what effect it has
- Tolerance: Slowly increase this parameter (hitting generate after each change) to see what points you get
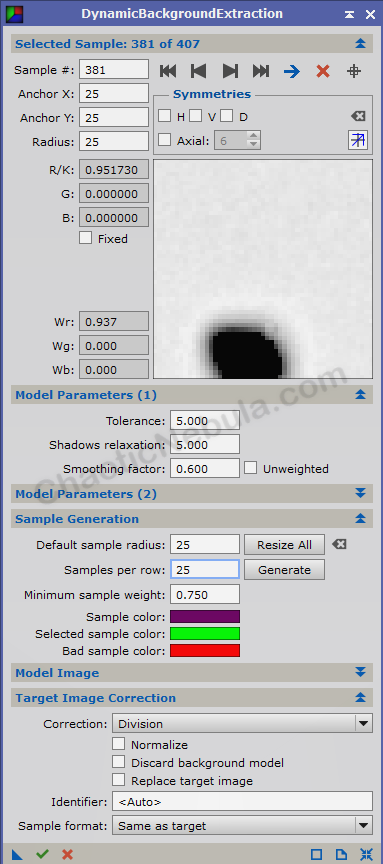
Once you get the points dynamically generated, you must review each one to make sure it is not on nebulosity or stars. Delete or move as needed.
Once satisfied, drag the triangle to the workspace to copy this model
- Target Image Correction
- Correction: Division
- Discard background model: unselected
- Replace target image: selected
Run the process.
Verify that the image looks fine. If a sample point was placed on a star, it will do strange things to the surrounding area. If this happens, either delete/move the point and rerun.
Look at the background model. You want this to be flat, one color. After one pass, you will see a gradient across the background model, this is what is being removed.

You will most likely need to run dynamic background extraction multiple times to achieve a fairly smooth/flat background.
Use this process across all images.
NOTE: When applying this to other filters, some of the points might turn red, meaning they are outside of the tolerance model and will not get applied. Increase the tolerance and select “Resize All”. Do this until they turn into valid points again. DO NOT hit Generate as this will create a brand new model.
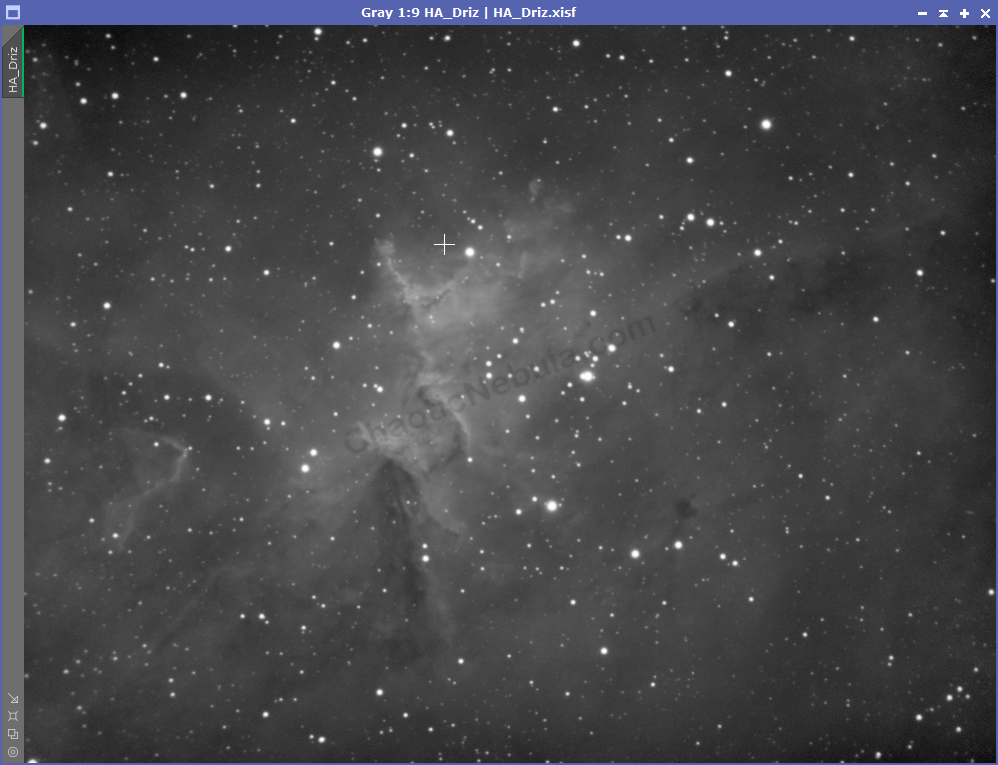
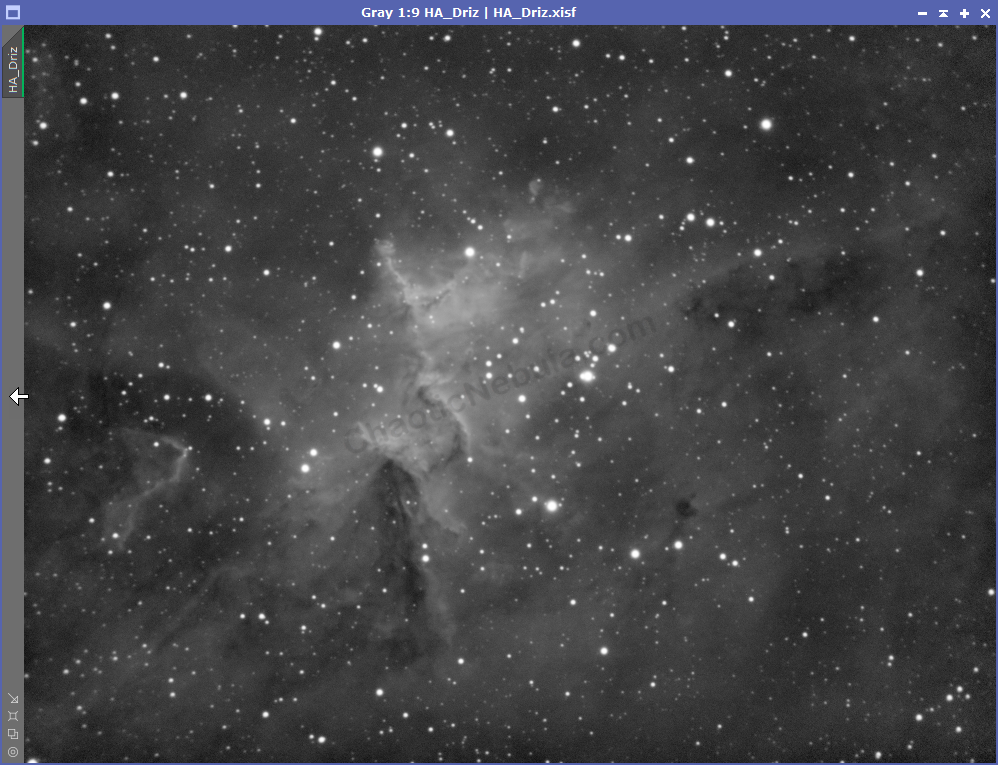
Simple vs Custom
Two different approaches. Which result looks better?
The approach you take will often be based on the type of image you are processing. When dealing with galaxies, where the important part of the image is contained in a small area, running the vignetting model often works well.
However, when working with nebula, you will want to use the background gradient approach as you will have to select small areas that represent the real background.
Advanced
There are times where the standard custom method still isn’t producing a good background extraction. For example, when dealing with LRGB filters, you are more likely to encounter more issues that need to be cleaned up, like the following
In this example, you can see a strange line running from left-right in the top 1/4 of the image.
In order to eliminate the line running, you can increase the number of samples per row. This will help take into account these abrupt changes that should not exist. However, you still need to make sure those samples do not sit on top of a star. It is easier to see the stars if you first invert the image (Image-Invert). You will have to modify the sample colors.
With the inverted image, you can easily see the strange line running across the top part of the image as well as the sample points that are sitting on top of stars. You can manually add a row of sample points as close to that line as possible.
With the increase number of sample points, the strange line is almost gone. Reapply the dynamic background extraction multiple times until the background model is mostly flat.
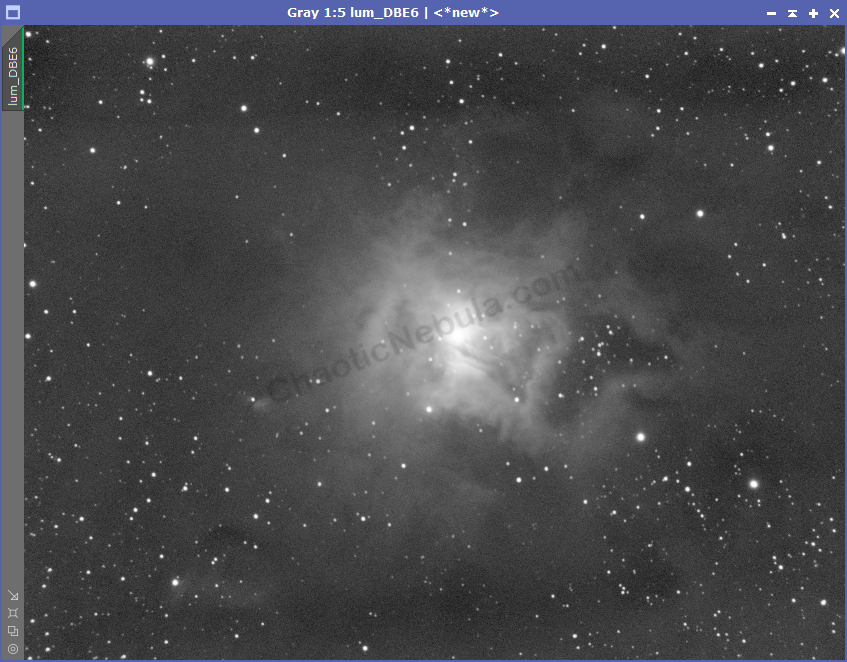
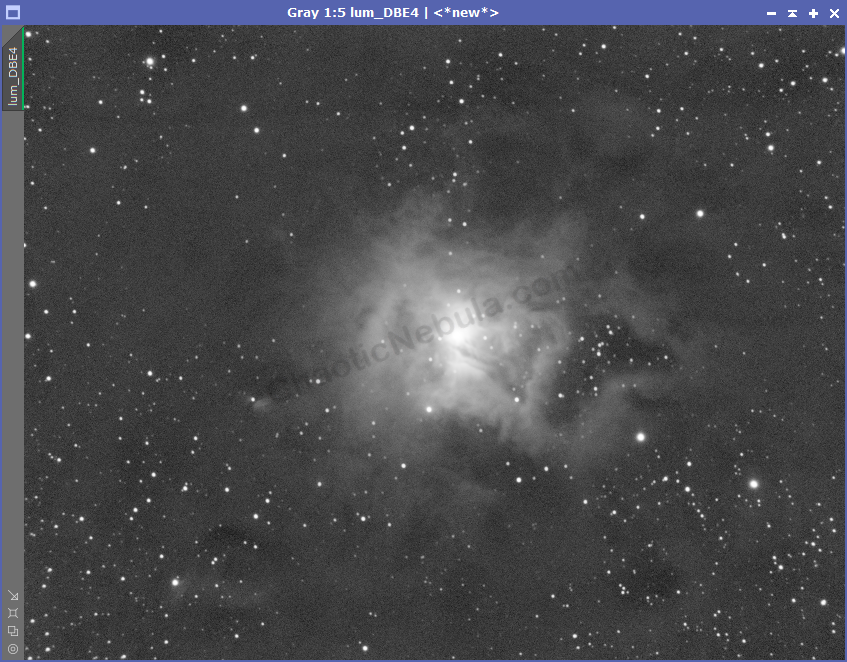
What’s Next
With the background gradients extracted, you can see start to see more of the object’s detail. You might also see some imperfections in the image like dust donuts. This is the time to try and correct the dust donuts.
The next step is to do low level noise reduction with TGV Denoise to regain that smoothness in our image that we lost with the background extraction process.