One of the challenges with mosaic images is the intensity of the signal between each panel of the mosaic. The panels will get captured across multiple nights with different sky transparency/seeing levels. All of this impacts the quality of the panels.
Before we can effectively merge all panels together, we need to equalize the brightness levels across all mosaic panels. Unfortunately, Linear Fit does not work well for mosaics. Instead, we will use a custom script called dna Linear Fit.
Note: To download the DNA Linear Fit script, visit David Ault’s mosaic tutorial. The script can be found in the Intensity Matching section. Download and install into PixInsight. It will get added to Script – Utilities.
Unsure of the mosaic processing order? Use the Mosaic Workflow for Astrophotos
DNA Linear Fit
The DNA Linear Fit process is extremely easy.
First, all images in the mosaic must be open.
Next, simply select one image as the reference and another as the target.
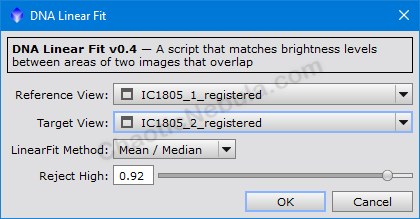
Once complete, save these images (ideally as new files)
Planning
Doing a 2 panel mosaic is extremely easy. But what happens if you have a much large mosaic? 6-panels? 15-panels?
In this situation, you need to be smart about how you use DNA Linear Fit. Take the following mosaic plan as an example.
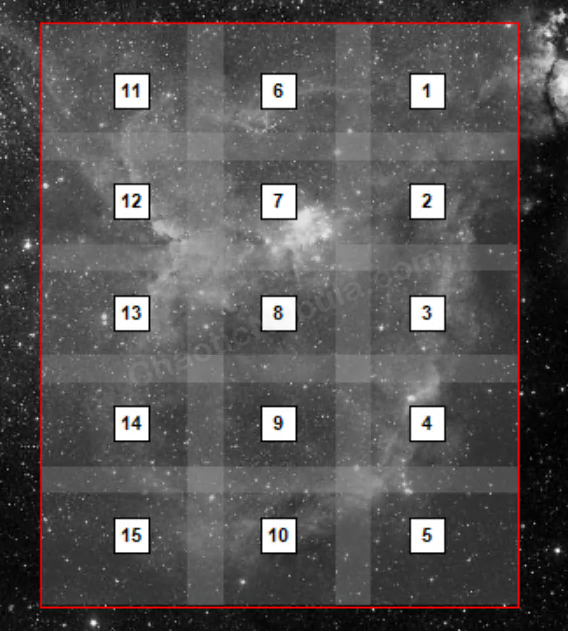
When running DNA Linear Fit, the reference image must overlap with the target. No single image does that in this mosaic. This is why you need a plan to help define the reference frames, target frames and order.
| Order | Reference Frame | Target Frames(s) |
| 1 | Frame 7 | Frame 12 Frame 2 Frame 8 Frame 6 |
| 2 | Frame 6 | Frame 11 Frame 1 |
| 3 | Frame 8 | Frame 13 Frame 3 Frame 9 |
| 4 | Frame 9 | Frame 14 Frame 4 Frame 10 |
| 5 | Frame 10 | Frame 15 Frame 5 |
As you work through the plan, make sure to save each image as a new file.
What’s Next
Now that the images are aligned and the intensities are matched, we can now merge the separate frames into a single image with Gradient Merge Mosaic.