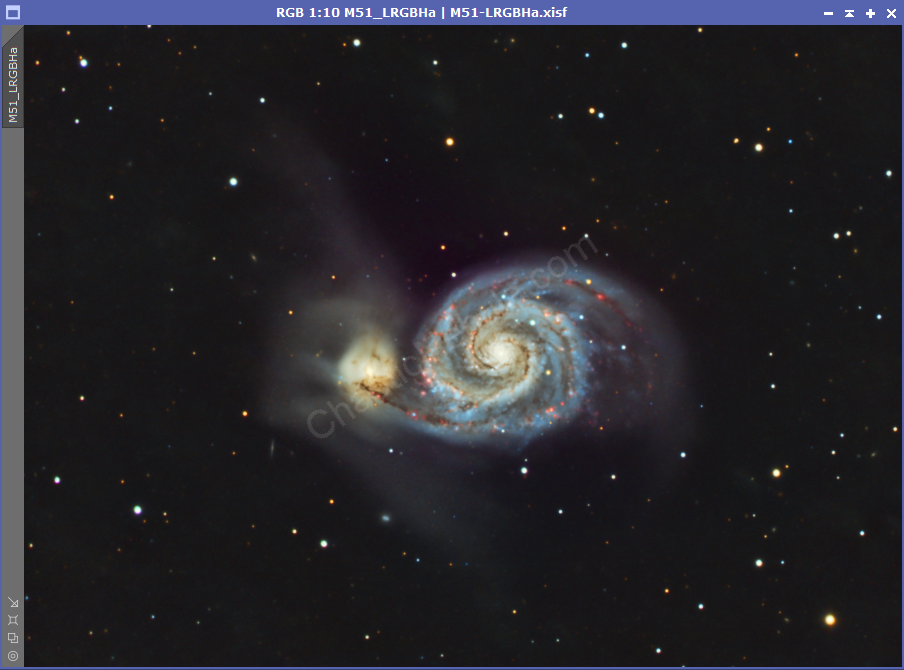
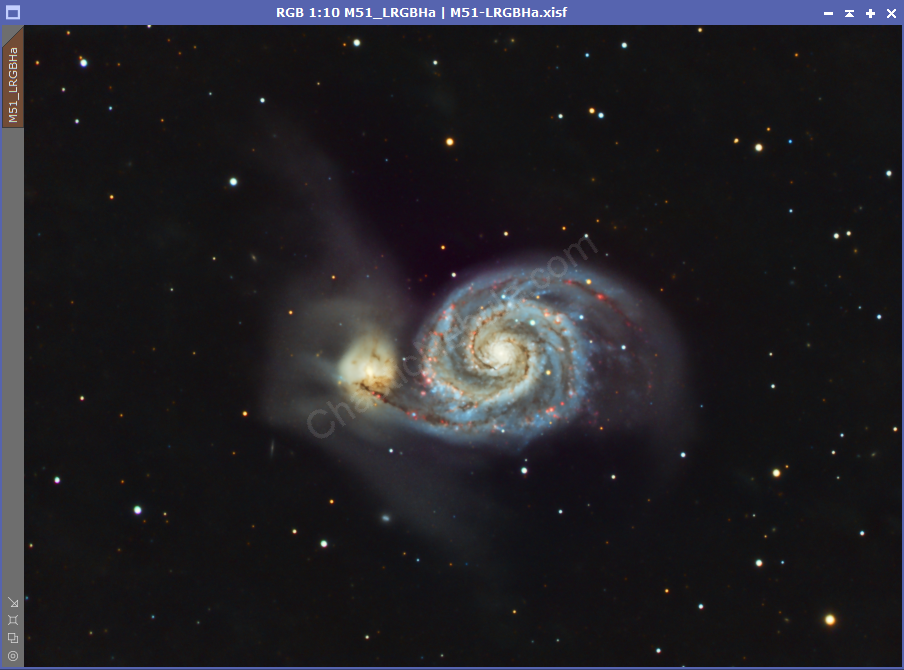
Astrophotography gets frustrating when you have hours and hours of data and you reach the end of your imaging processing workflow to find the result is lackluster. For example, the following picture of M51 – The Whirlpool Galaxy is a really good image of this often photographed galaxy. It is based on 40 hours of RGB + HA data. It shows the faint wisps coming from the smaller galaxy. I followed the PixInsight LRGB+HA workflow. Overall, the image is good.
It is hard to explain what is wrong with this image. The only word I could come up with is that it feels flat or dull. I would expect with all of the data, the galaxy should pop. After trying numerous approaches, I believe I ended up with something that is a more compelling end result.

Background
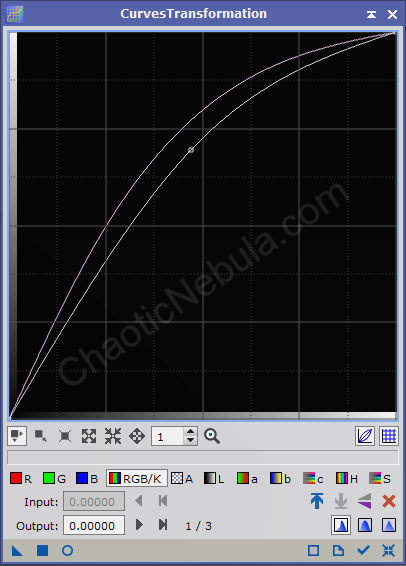
The initial image felt flat. The galaxy and wisps did not stand out against the background. Although the background of astrophotography images is rarely completely black, this image could use a reduction in the background brightness.
To reduce the background brightness, we need to create a range mask, being careful to protect the galaxy and the faint wisps.
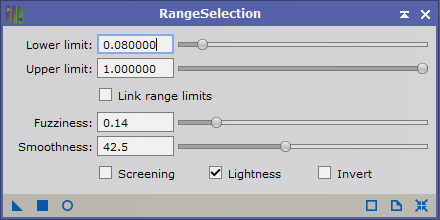
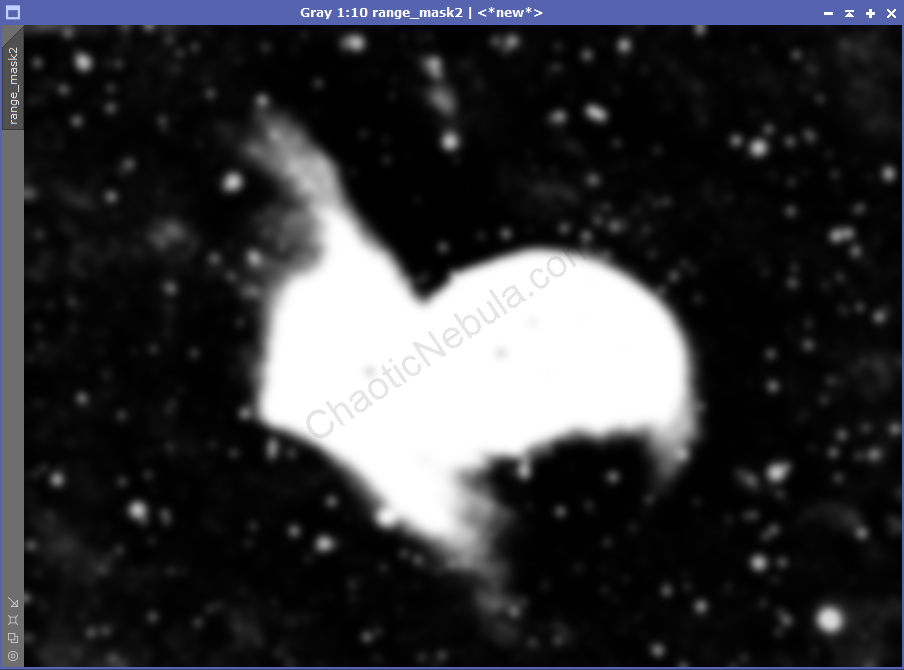
With the range mask created and inversely applied to our image, we can use Curves Transformation to gently reduce the background brightness. Use small adjustments with Curves Transformation and apply multiple times until you are happy with the result.
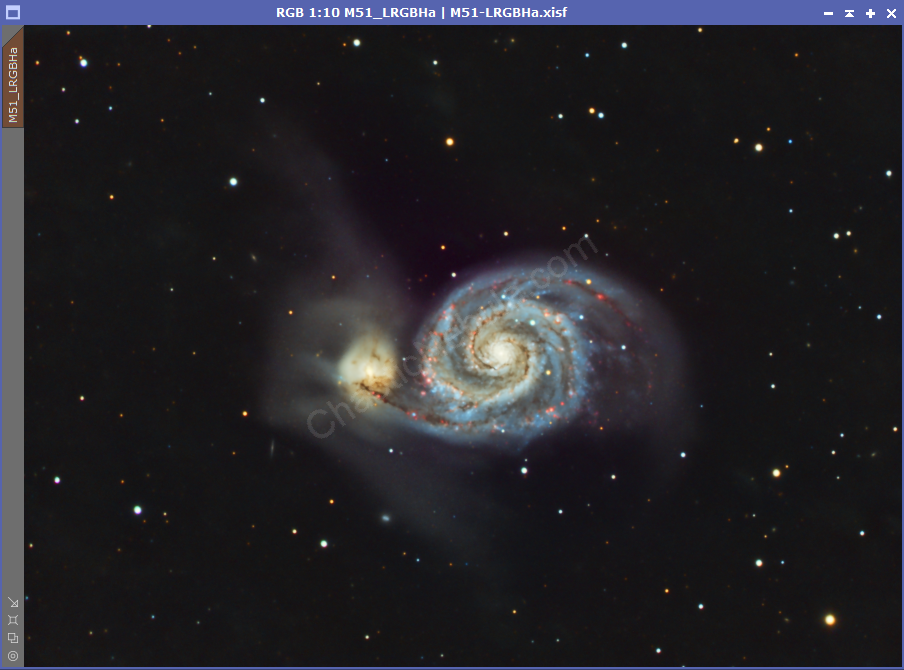
The galaxy, and the faint wisps, stand out a little better against the background.
Stars
With images having a nebula filling the entire field, we often want to reduce the stars impact on the overall image. This allows us to better see the structure of the nebula. However, this image does not completely cover the field of view. The non-galaxy portion just contains stars. By improving the star brightness and saturation, we can add interest in what would normally be a bland portion of the image.
We first apply our star mask to the image, protecting everything but the stars. To generate a good star mask, I often use this StarNet procedure.
For the stars, I want to increase brightness and color saturation.
Round 1, I increase RGB/K and Saturation.
Round 2, I only increase saturation.
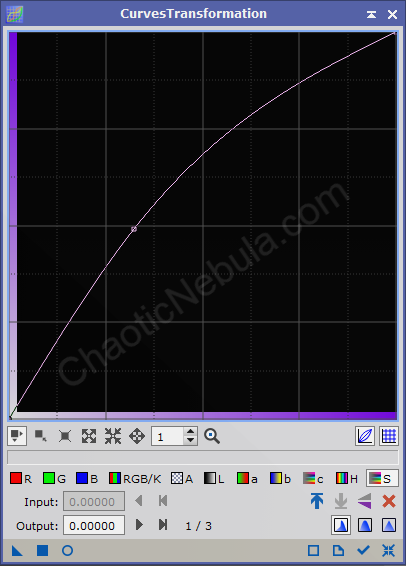
As you can see, using Curves Transformation on our stars has greatly improved the interest of the entire field of view.


Sharpening
The center of the galaxy contains a lot of signal. We should be able to mask the brightest areas and apply minor sharpening to improve clarity.
To create the mask, we use Range Mask and focus our parameters on only the brightest regions.
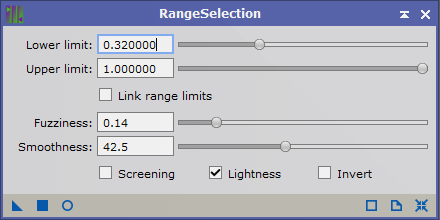
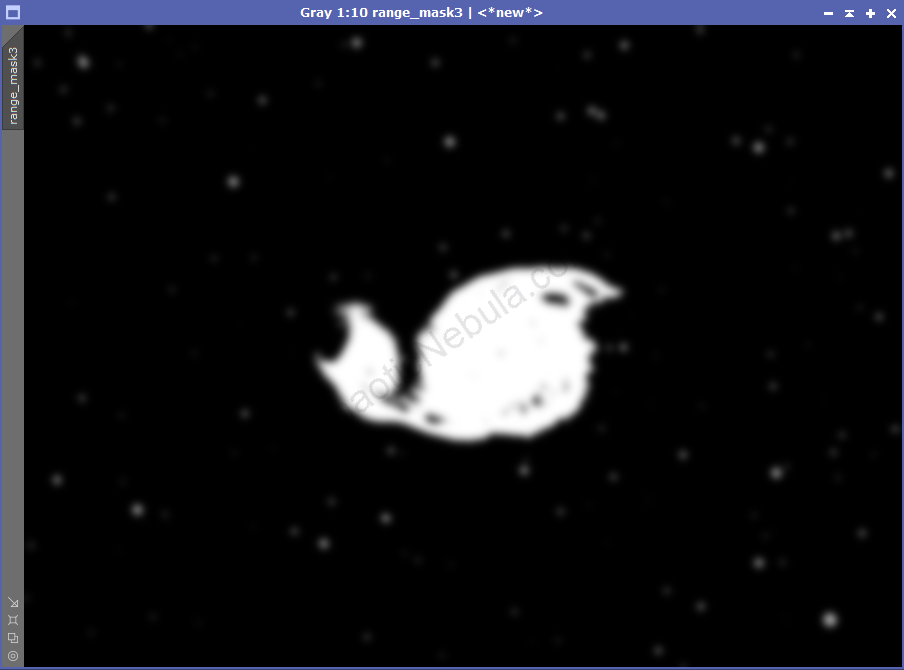
With our sharpening mask created and applied to our image, we can use Unsharp Mask to gently increase the clarity of our galax center.
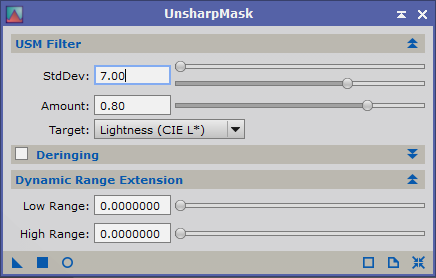
With Unsharp Mask, we increase the Standard Deviation slightly. Using the live preview will help find the right balance. We are only looking at small increases in the clarity of the galaxy center.
Once our sharpening is applied, you can see some improvement in the clarity of the galaxy’s core.
Conclusion
Although I followed the LRGB+HA workflow, there was still something missing from this particular image. The workflow got me 90% of the way to a great finished image. To stand out, this particular image needed a darker background, brighter/colorful stars, and minor improvements to clarity.
Overall, I think these changes made a big impact to the final image.