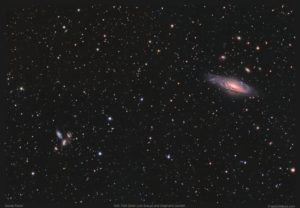
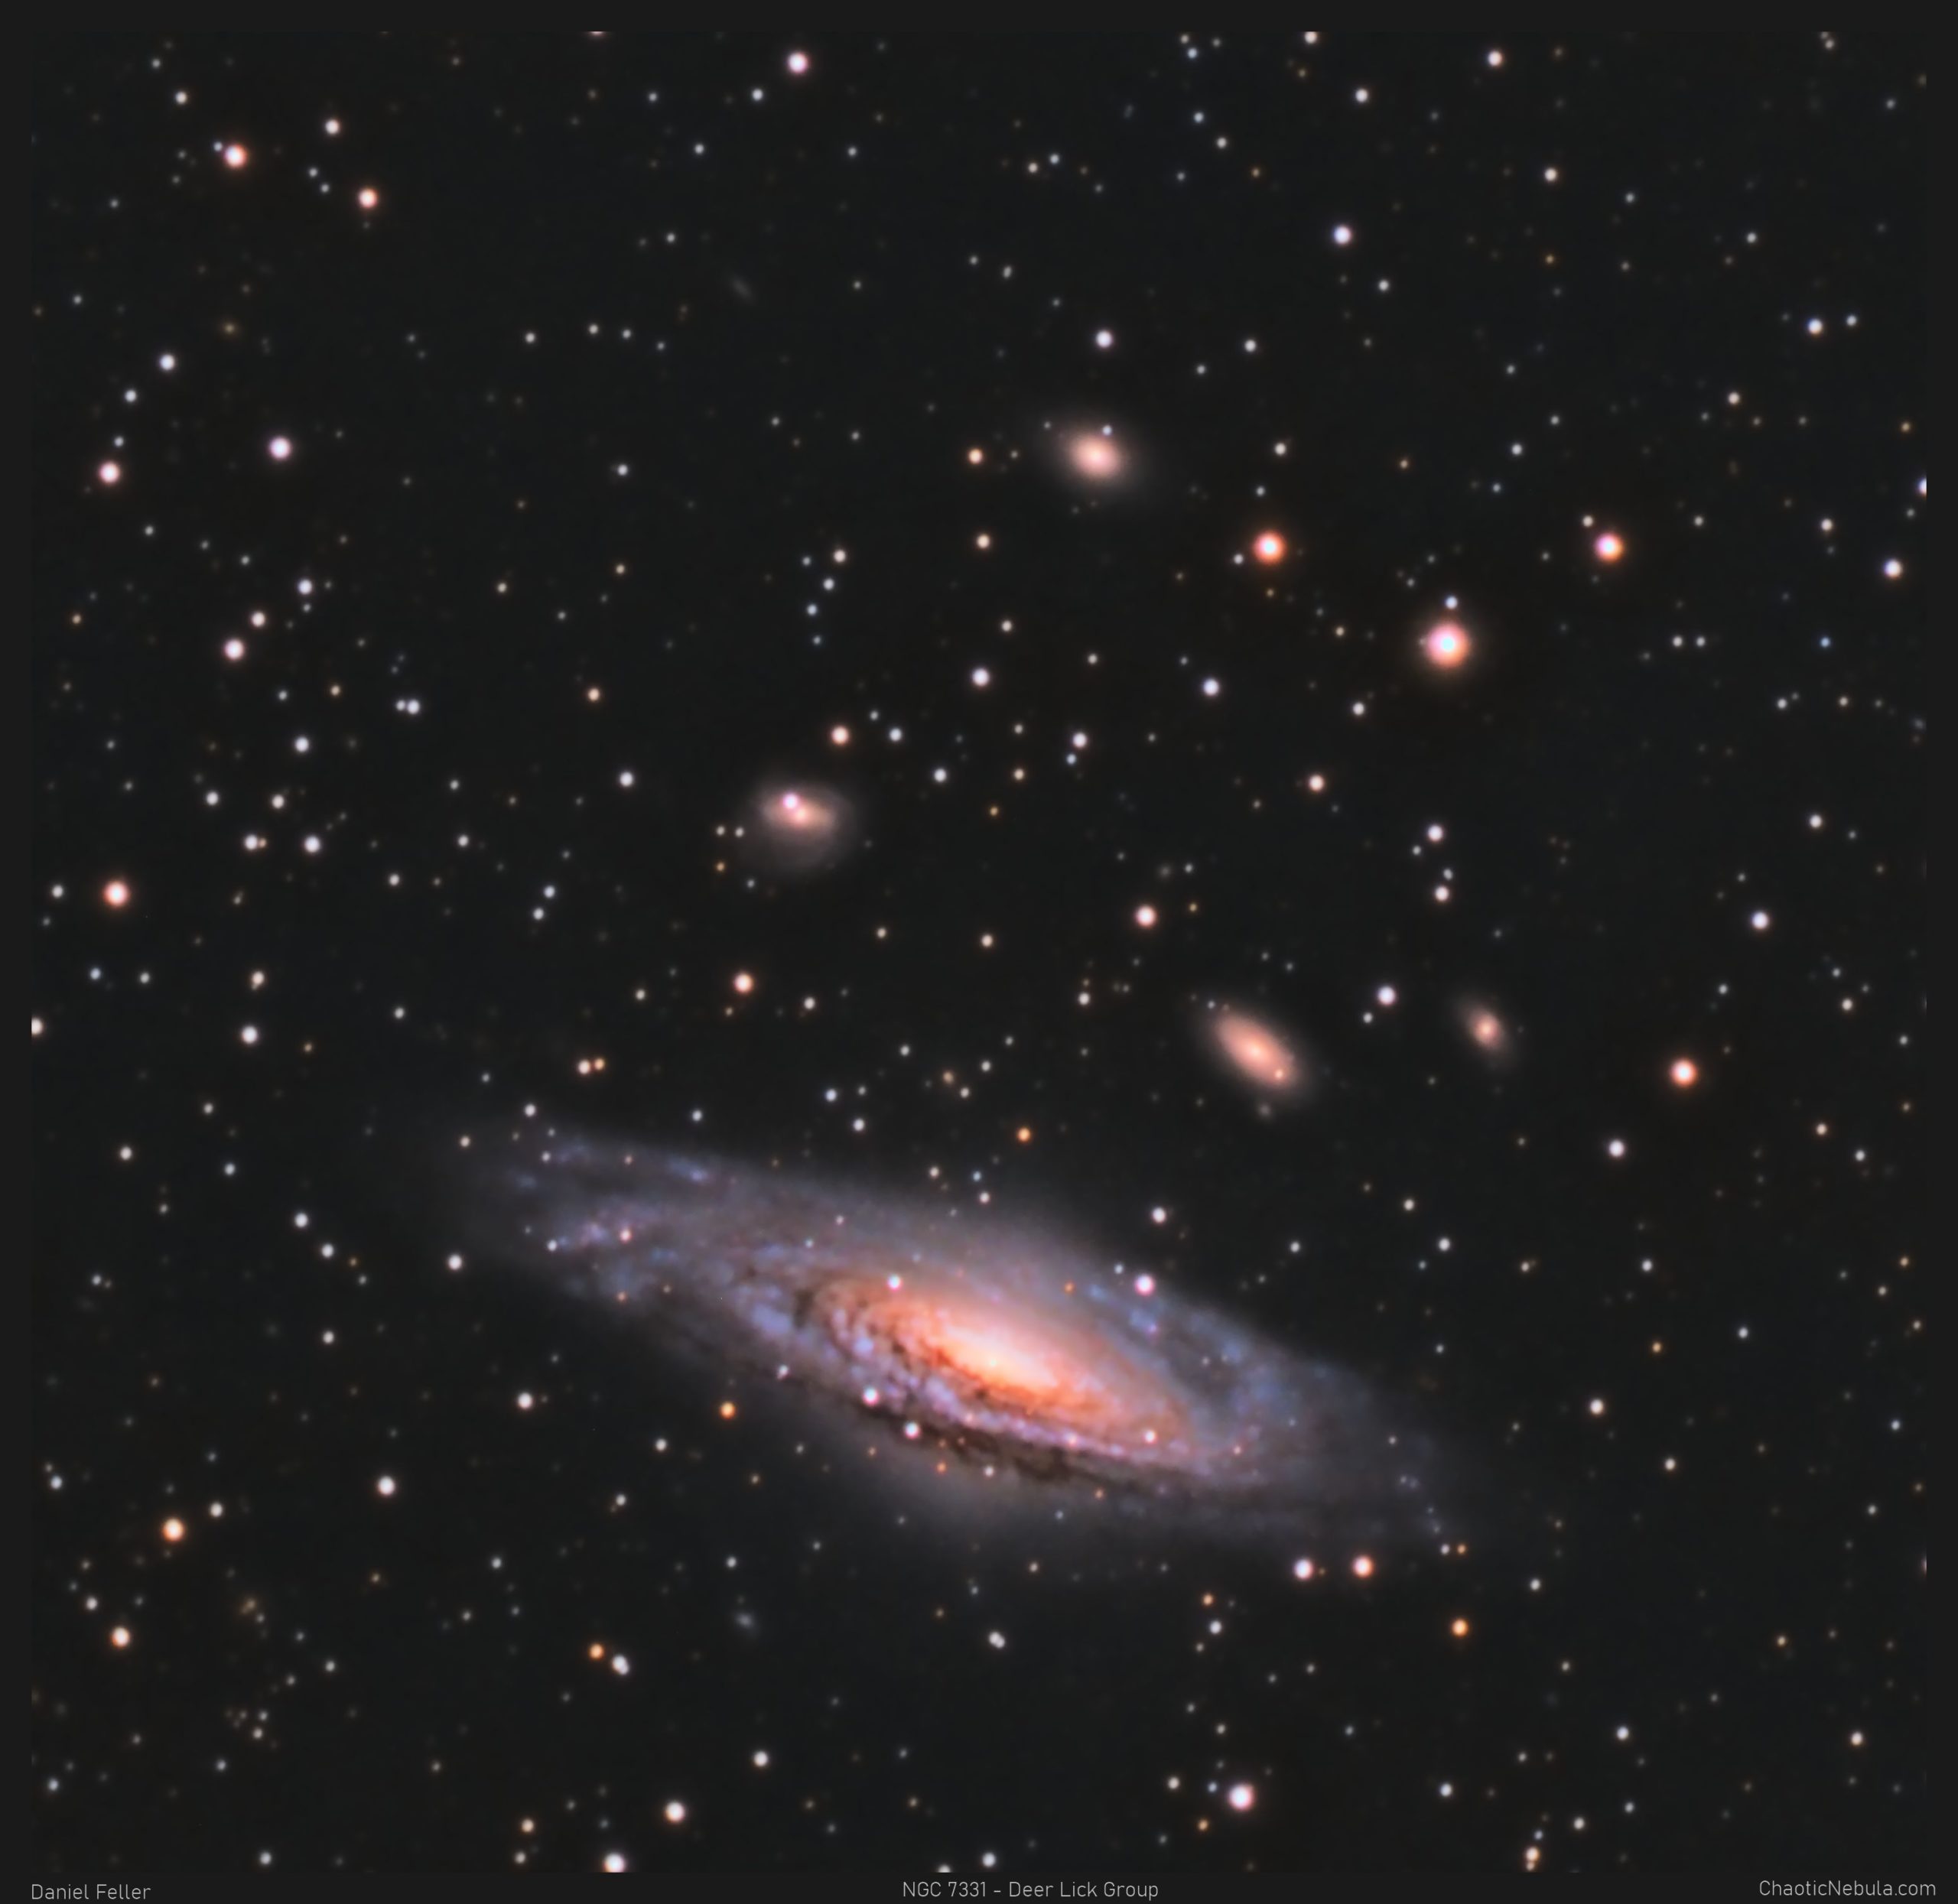
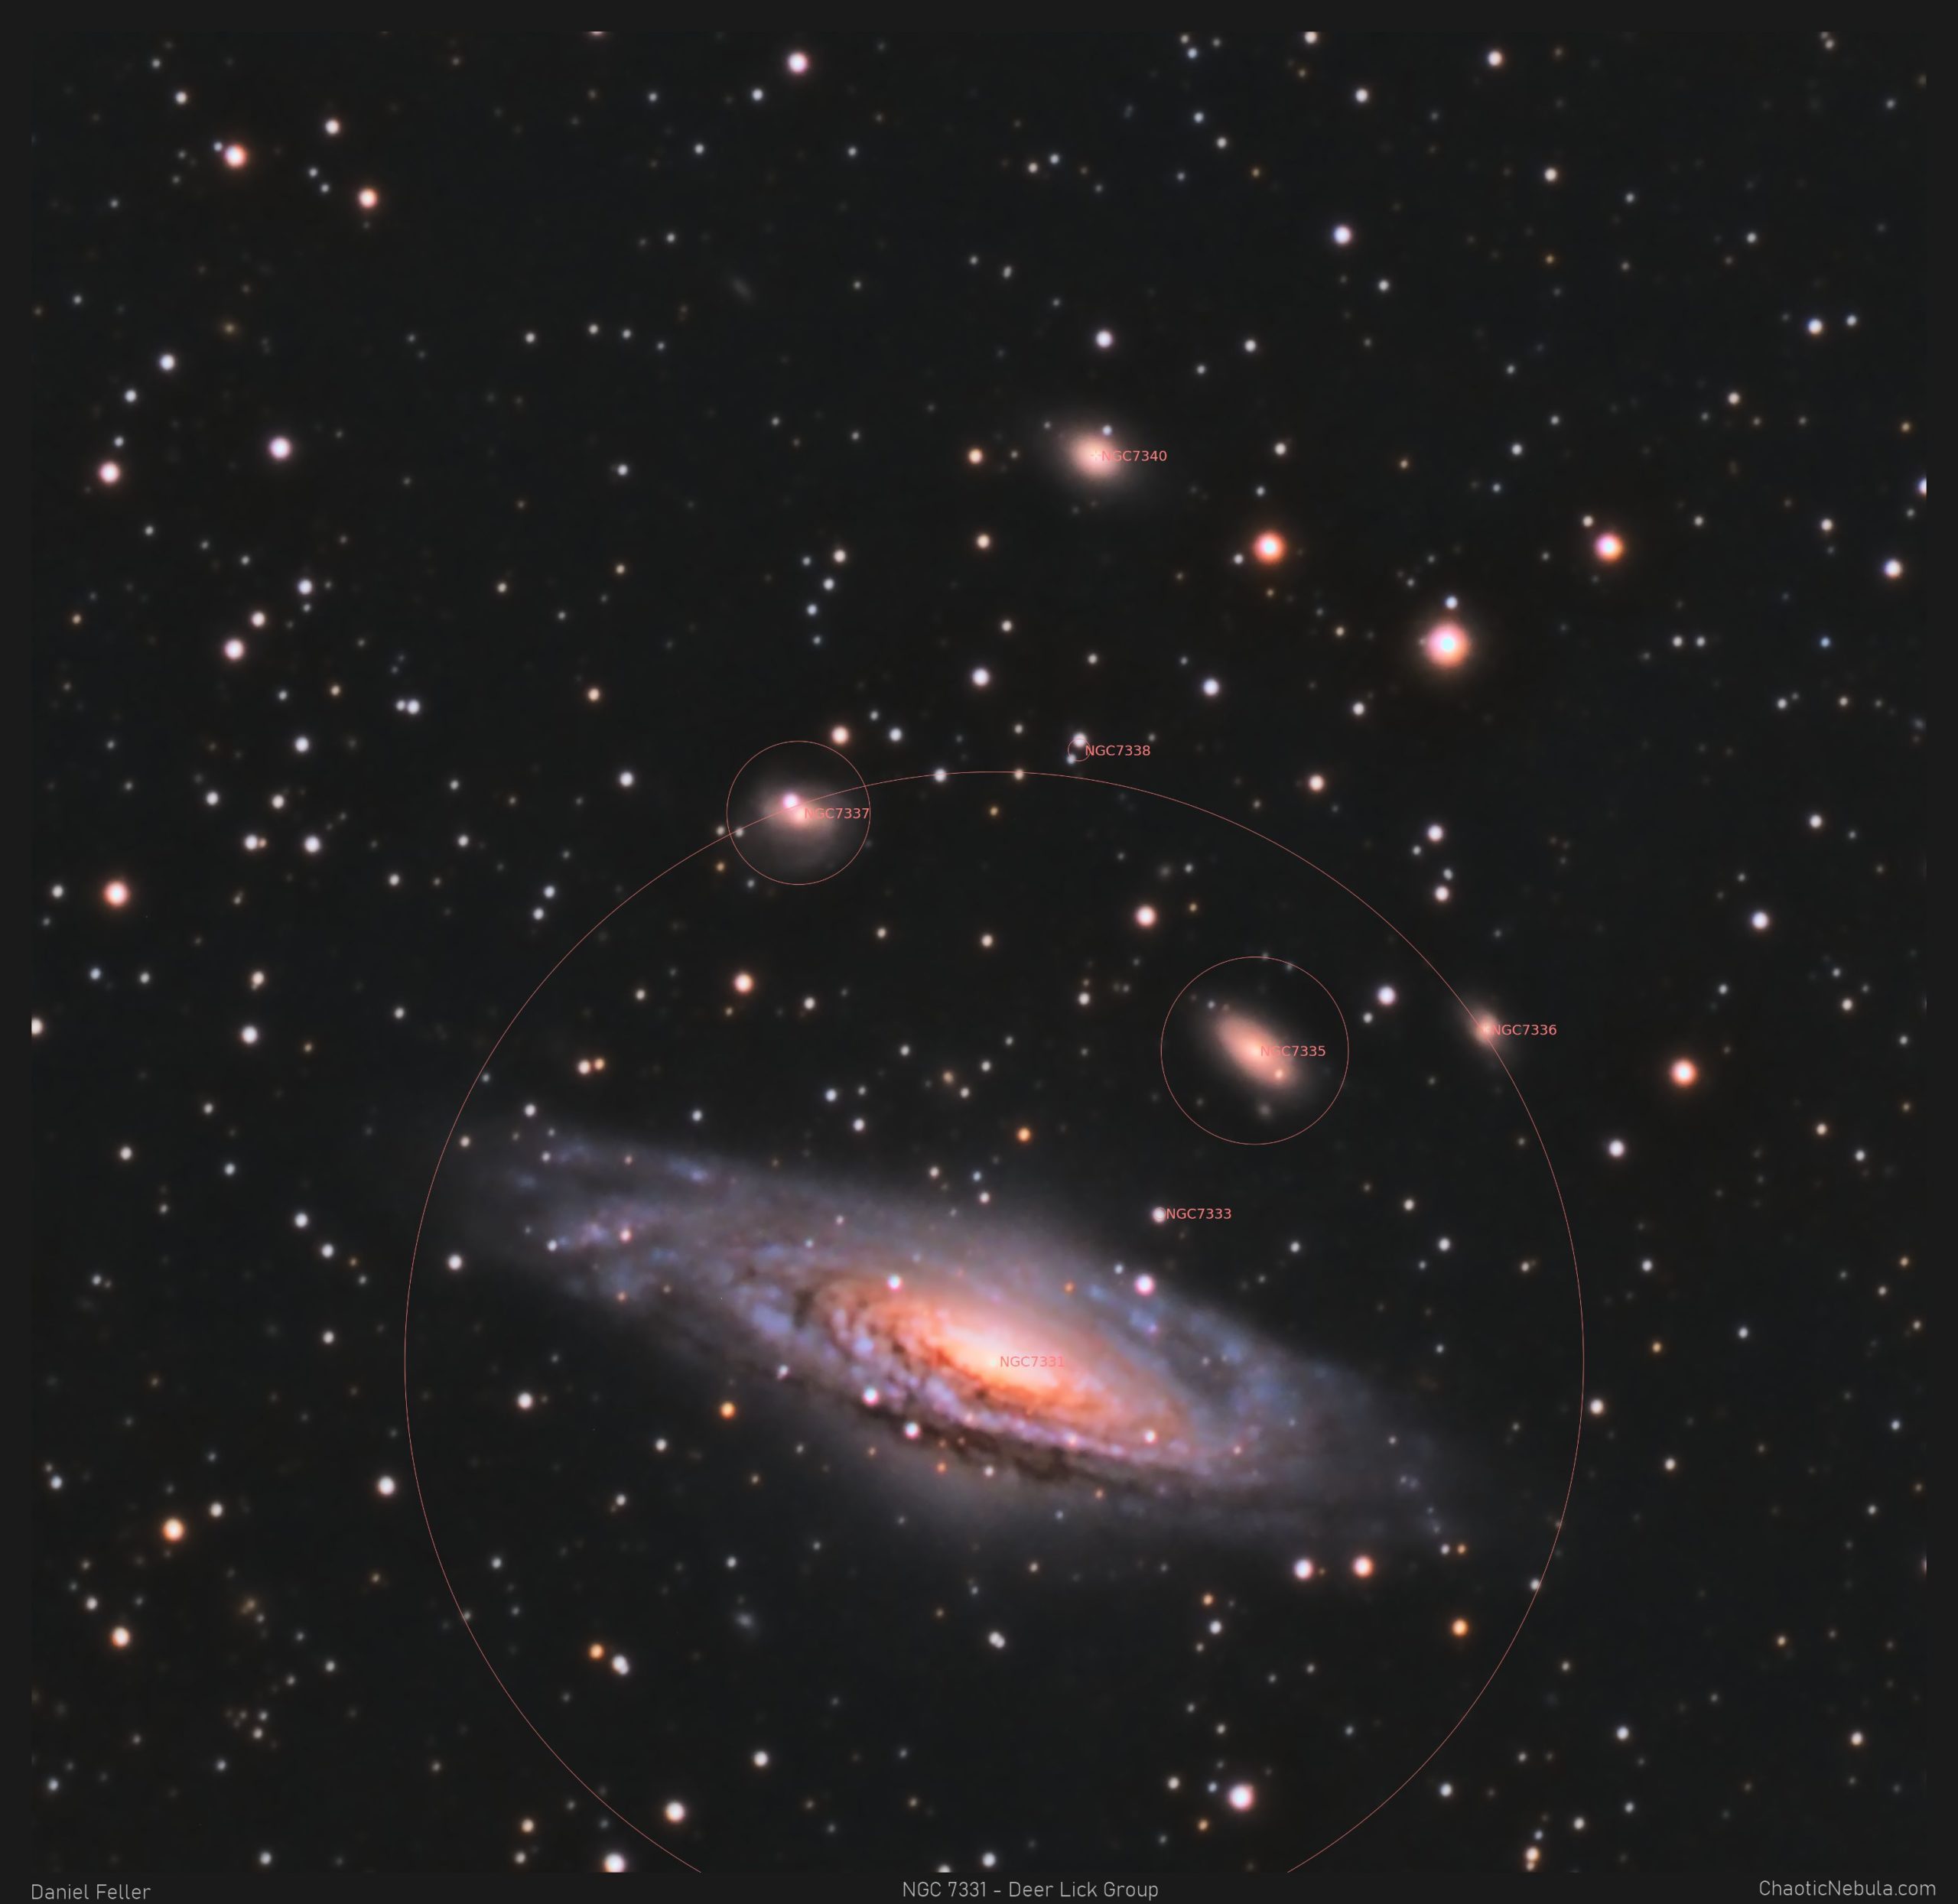
From our location in the galaxy, the Deer Lick Galaxy Group is close to Stephan’s Quintet galaxy group, which I’ve imaged in a larger mosaic. However, in larger mosaics, some of the details get lost. This time, we will focus on the NGC 7331 group of galaxies, called the Deer Lick Group.
In this one frame, there are 5 different galaxies. The big galaxy, NGC 7331, isn’t really part of the group of galaxies behind it. It just appears that way due to its location in the sky. For example, NGC 7331 is around 30 million light years away. But the other galaxies around it (NGC 7335, 7336, 7337, 7340) are around 300 million light years away. They are in the background and are not physically grouped with the big galaxy NGC 7331.
Also, two items shown as NGC galaxies (7333 and 7338) are not galaxies. NGC 7333 is a single star and NGC 7338 is a double star. These two entries are mistakes in the catalog.
- Workflow: RGB
- Red: 30*600 seconds
- Green: 32*600 seconds
- Blue: 42*600 seconds
- Binning: 1×1
- Total Imaging Time: 17 hours
- Imaging Dates: (6 nights)
- 10/3/2021
- 10/4/2021
- 10/5/2021
- 11/4/2021
- 11/6/2021
- 12/11/2021
Location
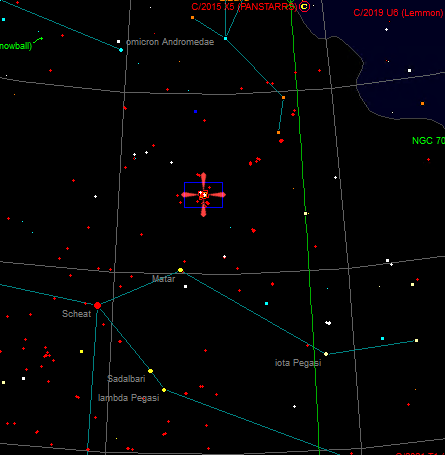
From northern latitudes, the Deer Lick Group is located just to the upper right of the great square of Pegasus. Ideally, those looking to image this group of galaxies should plan for the months of August through November. During that time, the galaxy appears highest from the horizon.
Imaging Notes
Some quick notes about imaging the Deer Lick Group
- Data: Because this was a mosaic, I was only able to acquire around 15 hours of data per panel. Typically, I collect 30 hours of data.
- Exposure Length: Even in Bortle 7 skies, I’m able to capture R, G, B with a 10 minute exposure. Quite pleased with the results.
- Luminance: I opted away from creating a synthetic luminance frame. I tried with this image and didn’t provide any improvements.
- Focal Reducer: I continue to be impressed with the Starizona reducer instead of my Antares reducer. The results are spectacular. All of the strange reflections I got with Antares are now gone, which means my image calibration works perfectly.
- Drizzle: Because I wanted a smaller field of view to provide a greater zoom, I cropped the raw images to focus on the galaxies. I applied a 4x drizzle to try and provide greater detail.